One of the more popular posts on this blog is “What’s In My Flight Bag,” a post from a couple years ago where I discussed what I was currently carrying in my bag when I rented an airplane. Since then things have changed a bit, and I thought it would be worthwhile to revisit the topic.
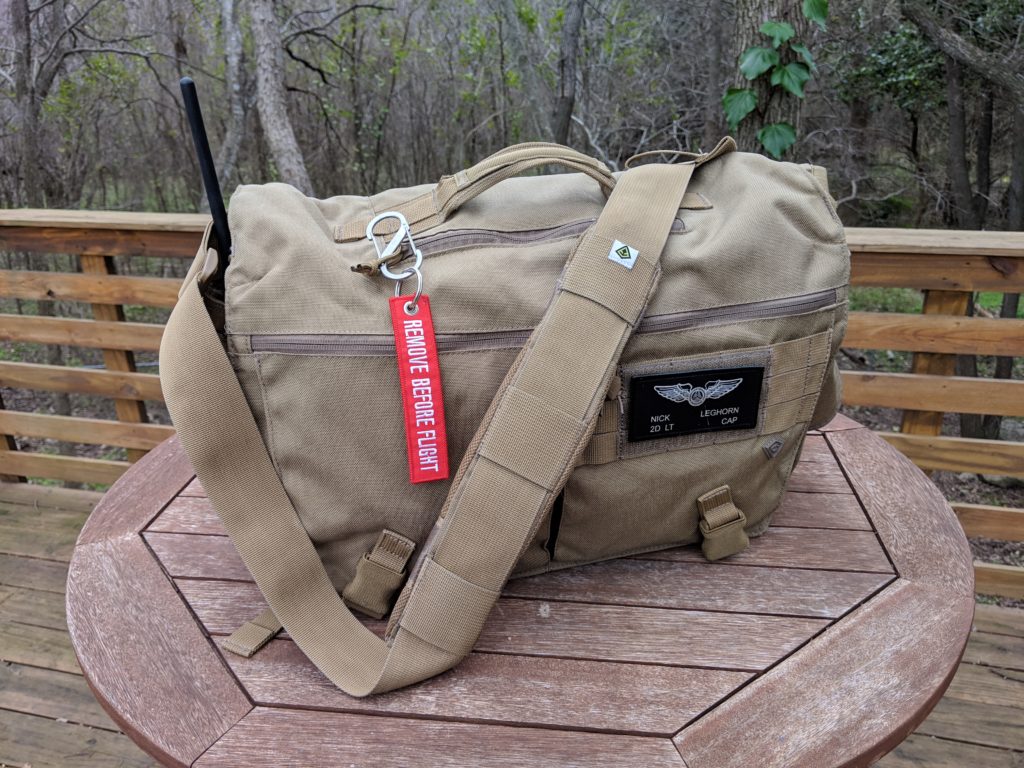
First things first, the bag itself has changed. It’s still a desert tan color, but instead of the full backpack I’ve gone with a messenger bag. Specifically the First Tactical Ascend messenger bag, which coincidentally is a business founded by the same family that started 5.11 back in the day (the manufacturer of my last flight bag).
The reason I prefer a messenger bag is simply because that’s a form factor that lends itself a little better to being moved around the interior of the aircraft I usually rent. Typically I’ll open the bag and throw it in the foot well between the front and rear seats, and the messenger bag is the perfect size to fit in that slot. Plus, if I need something specific from the bag it’s much easier to drag it through the gap between the front seats than a whole backpack.
It also means I don’t have yet another huge bulky bag to lug around on overnight flights.
The nice thing about this bag is that while it seems like a smaller bag than my previous one, I can actually fit just about everything I used to carry in it still. I don’t because I figured out that I don’t need everything, but I could if I wanted to.
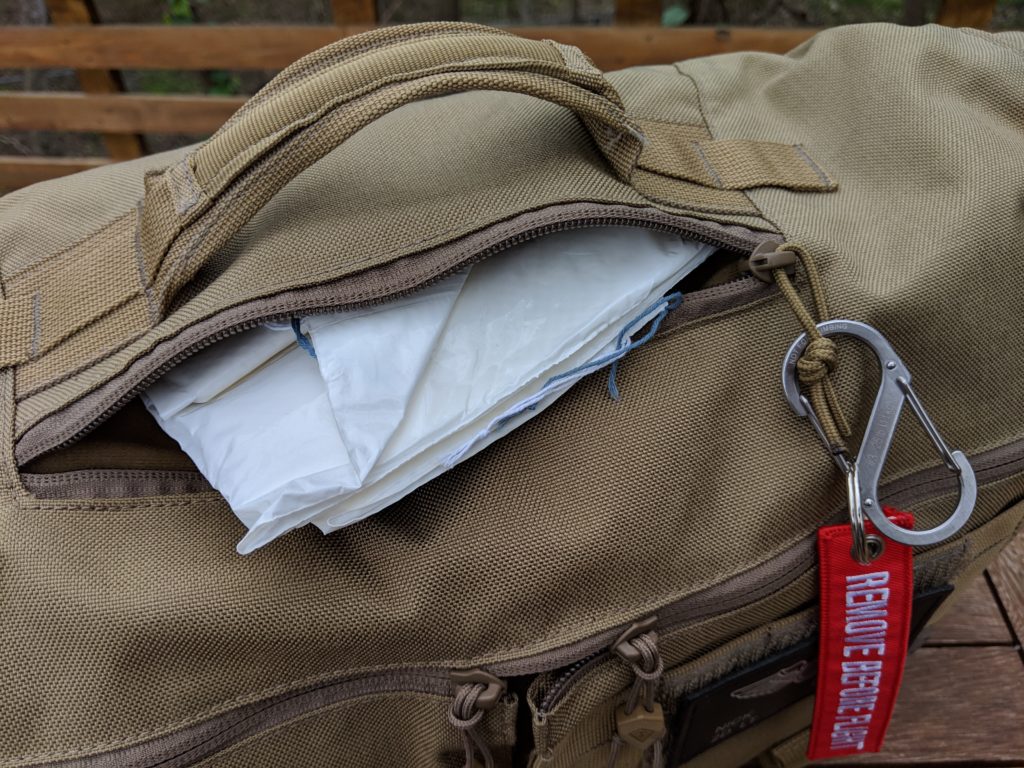
The place of honor in the bag, the top pocket with the bright red “REMOVE BEFORE FLIGHT” ribbon attached, is reserved for… air sickness bags.
There have been a couple times in the past where passengers have been along for a slightly more bumpy ride than they had hoped, and while only one person has actually vomited in an airplane I’ve been flying (so far) there are a couple more times where people have come close. Having the air sickness bags handy and easily identified is critical — in a moment of high stress, people tend to be capable of only basic instructions, and being able to say “pull the red ribbon” gives them an easily identifiable and quick to perform action.
While that’s usually where the ribbon lives, it’s not permanently affixed. I have a tendency to forget things, so I use that red ribbon to remind me if I’ve left some critical component somewhere. Usually my shaving kit that I love to leave in hotel bathrooms. I lost four shaving kits before I implemented the system — haven’t lost a single one since.
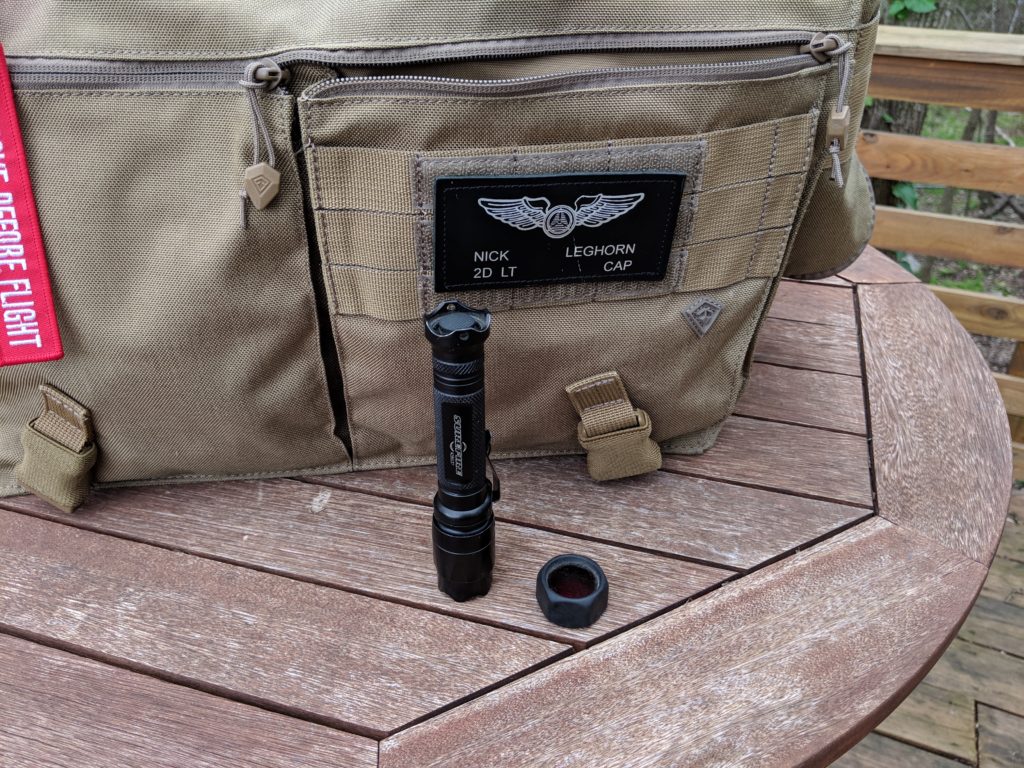
Front pockets are reserved for (A) things I will need in an emergency and (B) critical small items that I might need, such as the keys to the airplane.
In this case the only thing I keep in the front pocket on a regular basis is the same SureFire E2D Defender LED flashlight that I had in my original flight bag, along with a red filter for night flying use. That flashlight has saved my butt so many times, whether it’s looking for a errant scrap of paper in the air or helping tie down the aircraft on a dark ramp after landing, it is probably one of the more heavily used items I have in my bag. And thanks to the rugged construction and use of lithium batteries it has taken a beating and kept on working through all sorts of conditions. 10/10, would pay nearly $200 for it again.
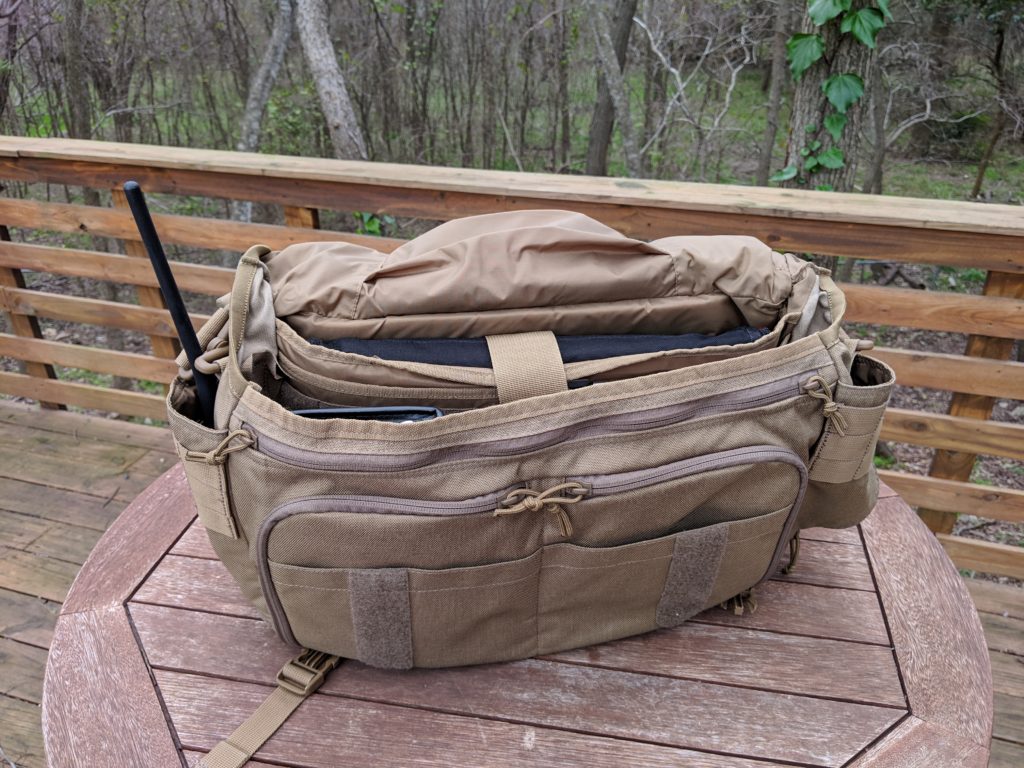
Open the flap and there are a bunch more pockets. This bag is pockets galore, but rather than having them all haphazard there’s some method to the madness. They all seem logically laid out and easy to access. That’s great for keeping things organized yet accessible, a key feature for trying to find small items while thousands of feet in the air in a flying tin can.
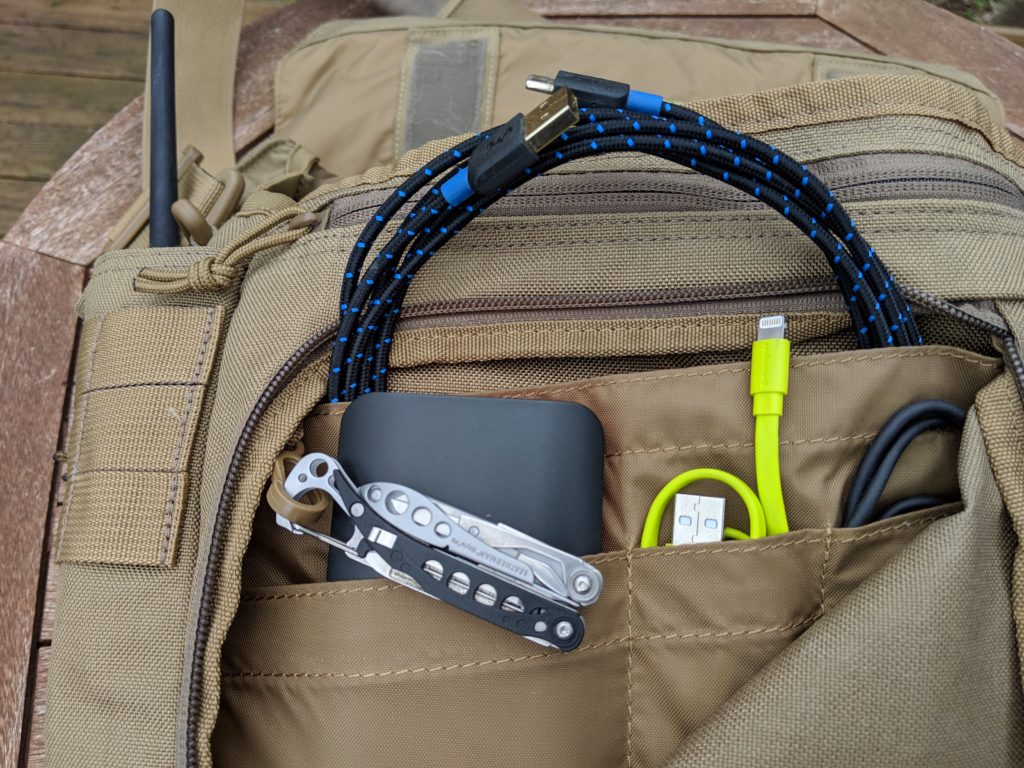
The front left pocket is all about power. I’ve got a 10,000 mAh portable battery that can completely recharge my iPAd, Pixel 3, and my wife’s phone before giving up. There’s also the appropriate charging cables laid out in their own pockets and ready for use.
Also here: a TSA approved Leatherman Style PS. Extremely useful for removing hot oil dipstick caps after the engine has been running for a while, or dogging down cowl tabs that refuse to budge with mortal fingers, or any of hundreds of other scenarios where I’ve used this tool. Highly useful.
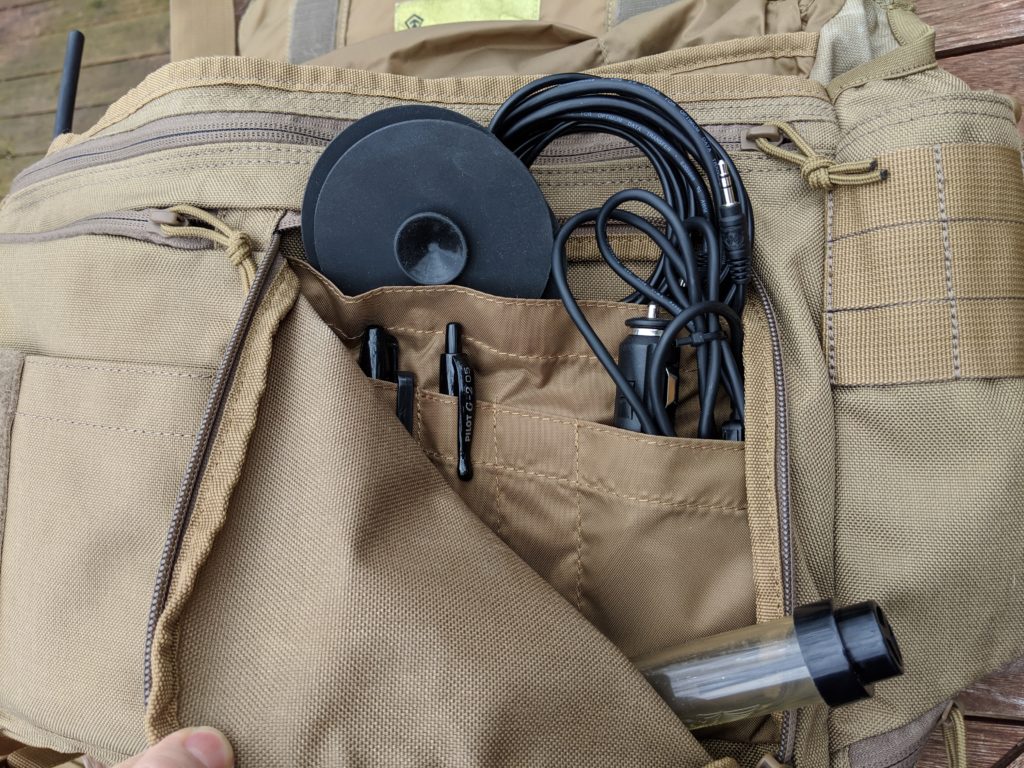
The other side is a little more haphazard. There are some pens, a small fuel strainer, a cigarette lighter power adapter for some of my gear, an audio patch cable so I can play my sweet tunes through the audio panel, and some instrument covers in case one of them fail and I need to ignore it.
That about covers the small items on the outside. Moving inside now…
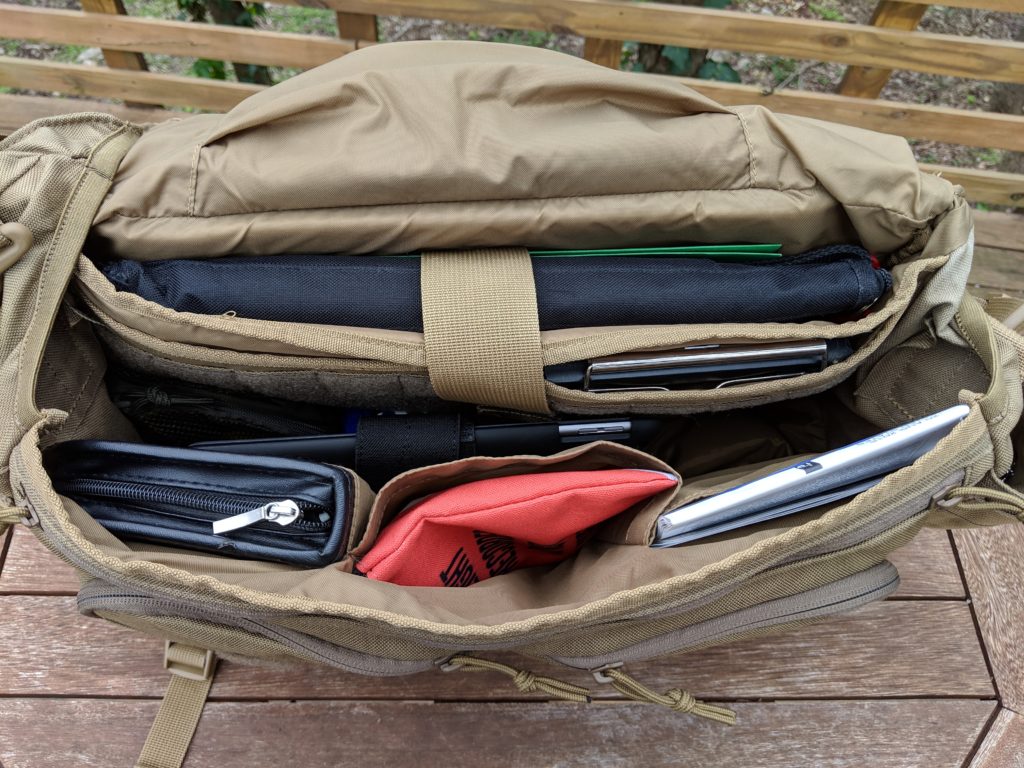
Like I said, this bag has a ton of space. From a dedicated laptop pouch (that I use for my document binder, more on that in a minute) to some seriously large pockets there’s space for everything.
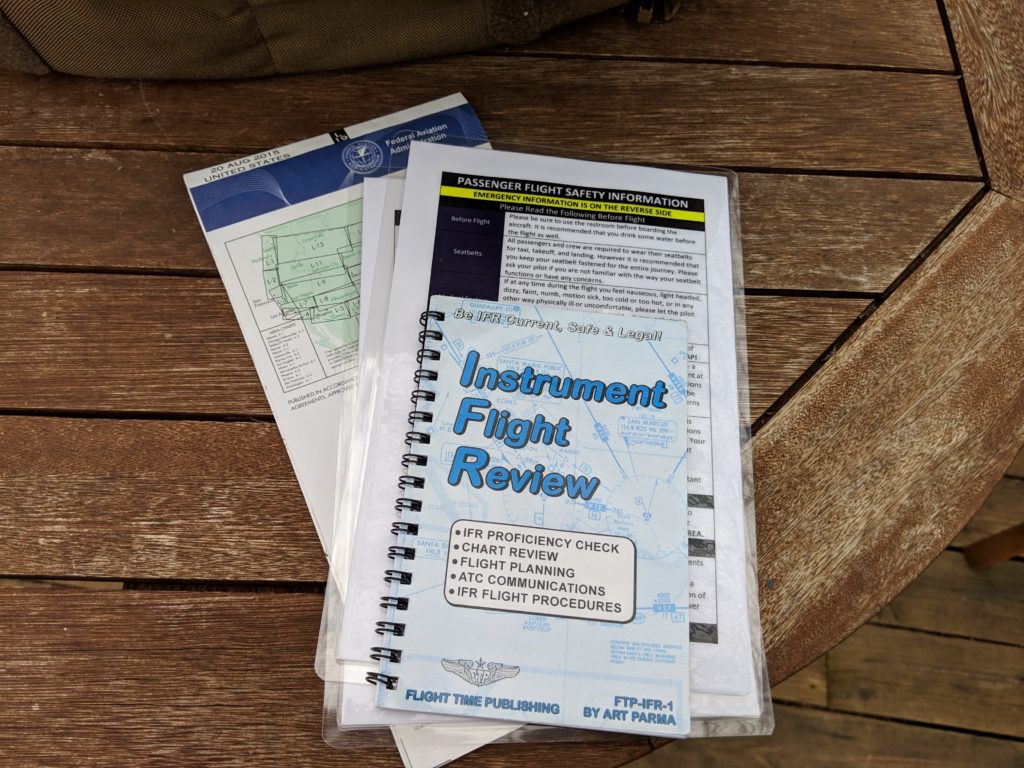
Bottom right pocket: some paper documents. I usually keep a paper copy of the VFR sectional in here (just as a backup for the iPad), along with a couple passenger briefing cards that I wrote based on a template I found online and laminated. Back when I owned my own airplane there perfectly matched the aircraft and made the passenger briefing a whole lot easier, but since I typically fly the same make and model even when I rent now I just point out the highlighted differences between the card and the airplane. I also keep a small instrument flight review book in there just in case I wanted to look something up.
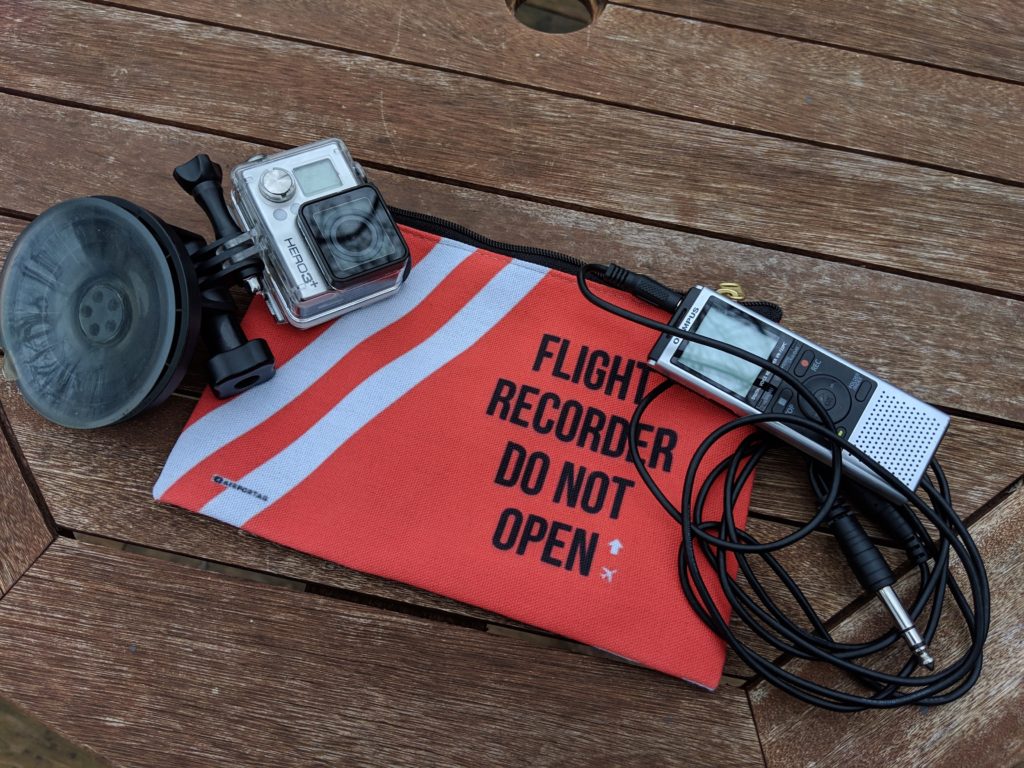
Middle pocket: recording equipment. The cheeky “FLIGHT RECORDER DO NOT OPEN” bag I got from Airportag and contains all the recording equipment and cables I need to record my flight. I’ve got two cables in there, both that plug into the standard headphone jack for the aircraft audio system. One is a straight plug that connects only to the recorder, another is a “splitter” cable that enables you to still connect your headset to that same jack. The audio recorder is an Olympus VN-722PC. The video camera is an older GoPro Hero 3+ with a suction cup mount that’s easy to stick to aircraft windows.
In the left pouch is the QT Halo headset that I reviewed here.
There’s a couple items in the middle of the bag.
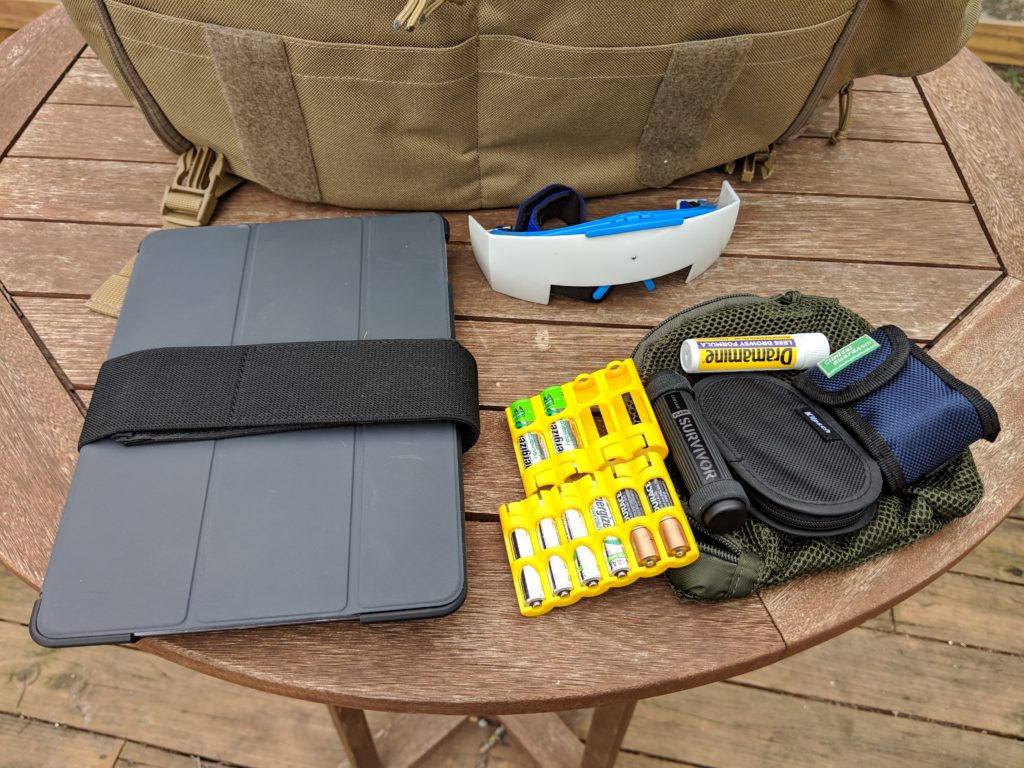
One is a pouch (velcro affixed to the inside of the bag so it won’t bounce around) with some small items like Dramamine, a caddy with batteries in it, a spare set of in-ear headphones, a pulse oximiter, and a rugged USB drive.
I’ve been in a position at the end of a long Civil Air Patrol photo recon mission where we need to transfer a large number of photos for analysis, and the last thing anyone remembers is a spare USB memory drive. So now you have to send your SD card away on a flight to the state capitol to be downloaded, leaving your camera useless. Having a USB drive you’re OK with letting go is a good way to avoid that situation and keep your camera in action. I know, it’s a very specific use case, but it’s the reason it makes sense for me.
There’s also a pair of Jepp shades for simulated instrument training because, why not? They don’t take up much space and I’m never one to miss an opportunity for some training.
I also have my iPad (loaded with Garmin Pilot) in my MyGoFlight iPad case. I like to keep the magnetic cover on as much as possible but I do remove it completely while in flight.
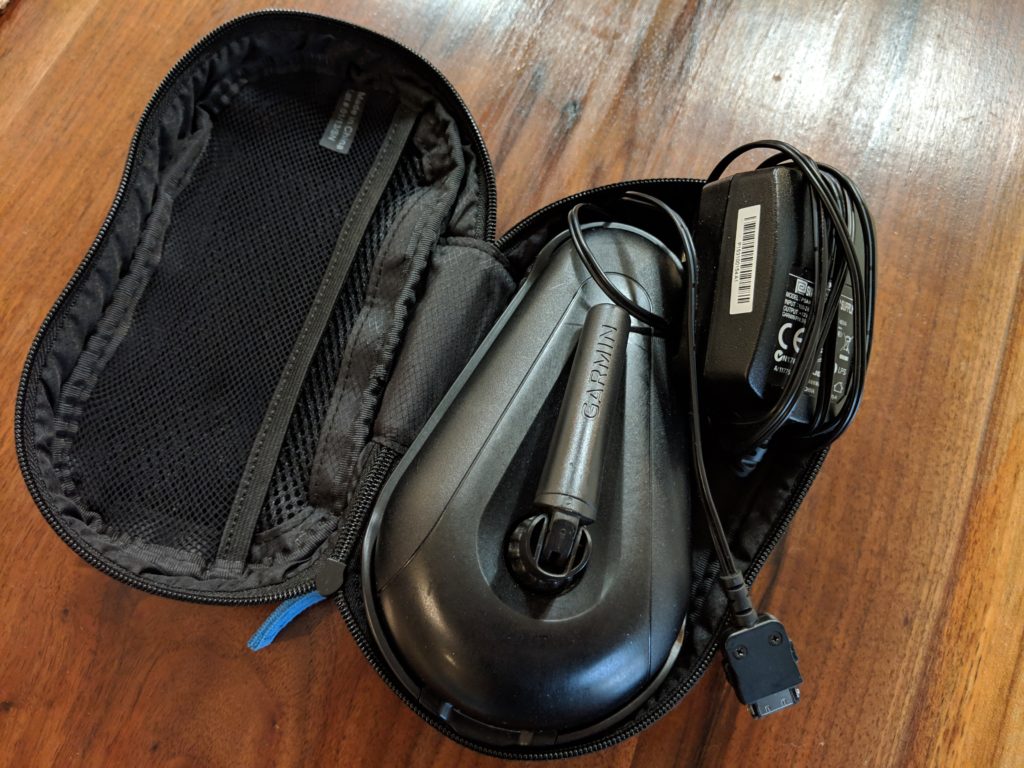
Something else I never leave the ground without is my Garmin GDL-39. I’ve talked before about the wealth of information that you can gain by using the FIS-B service that’s available, and I know for a fact that it has enabled me to take safer flights and be more confident with my ability to identify potential weather issues before they become emergencies. In my opinion the iPad, Garmin Pilot, and the GDL-39 is the minimum that any cross country pilot should be flying with these days.
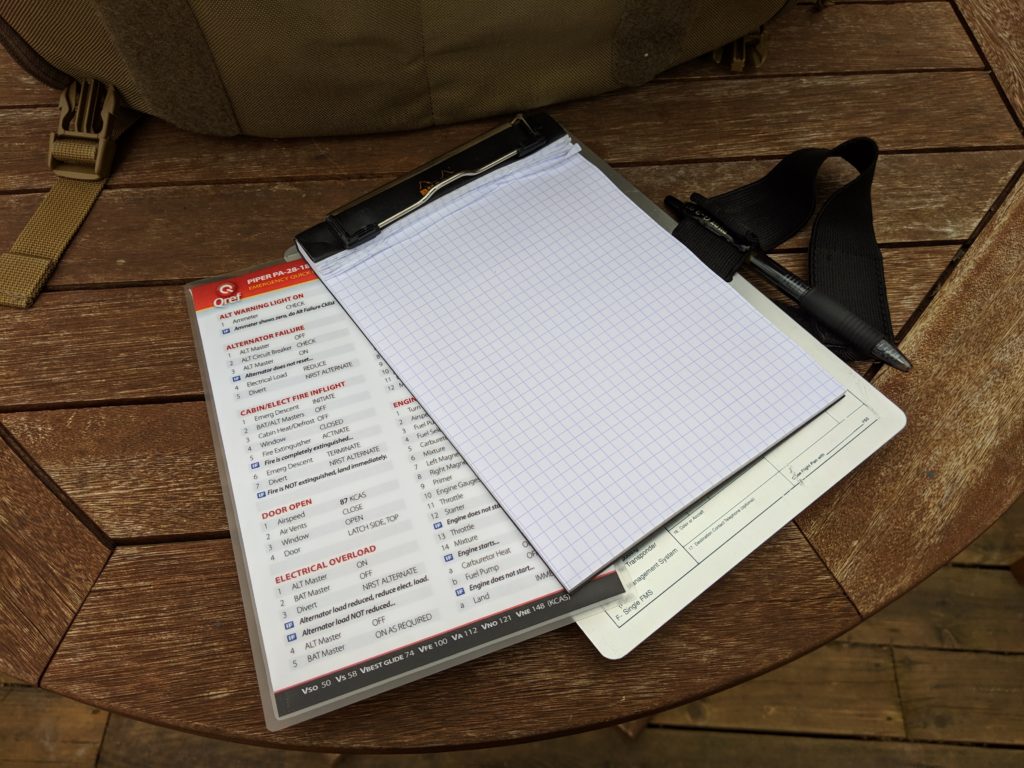
Despite all of that technology I still keep a good old fashioned kneeboard in the bag, complete with a pad of graph paper and a backup emergency checklist for the kind of airplane I usually fly. I prefer graph paper because I find it easier to plot flights and use, especially if you’re mapping out a search pattern before a flight.
The last thing that is in my flight bag is the one thing no pilot can leave the ground without: documentation.
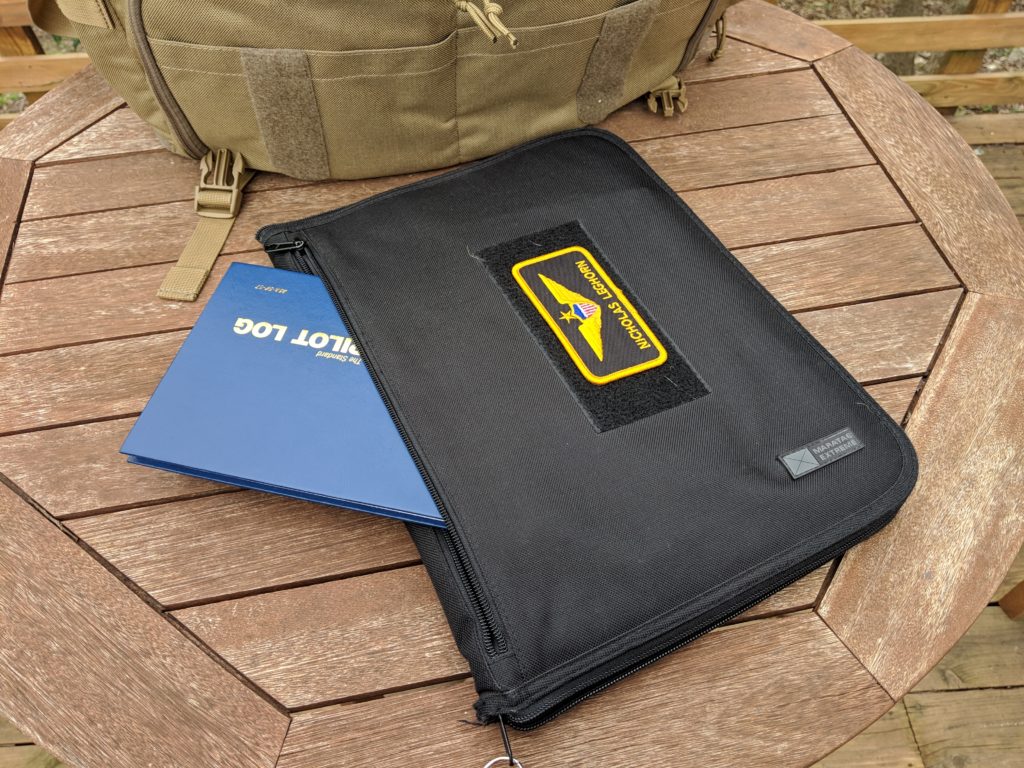
County Comm used to have a product called a “PadFolio” that allows you to keep a standard size pad of paper and other documentation inside. The outside of the product has a velcro patch to stick whatever IDs you want on the front, and a front pocket that’s perfect for keeping your logbook.
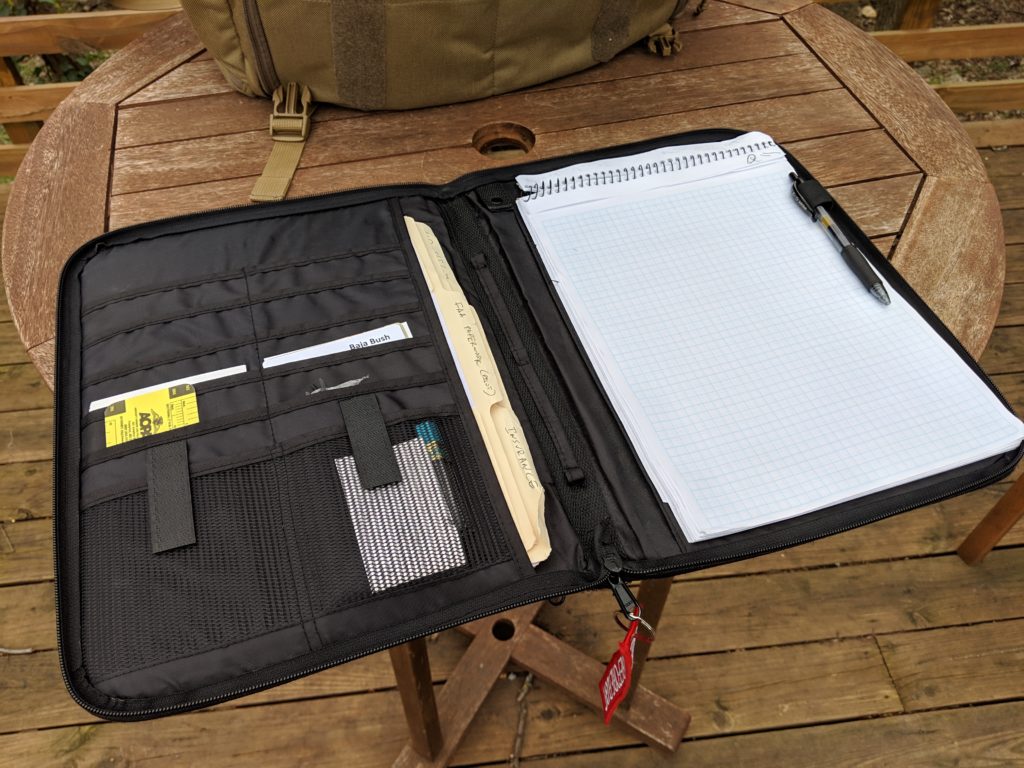
On the inside is the eponymous pad (again, graph paper) and some manila folders organizing all of the important documents that I would need for (or after) a flight. From a copy of my renter’s insurance policy to some spare aircraft registration forms (hey, a man can dream!) I’ve got a print-out of everything. I also have a digital copy of everything including my logbook in case they perish in a fiery crash, but just in case the flight school wants to see a copy I already have them on hand.
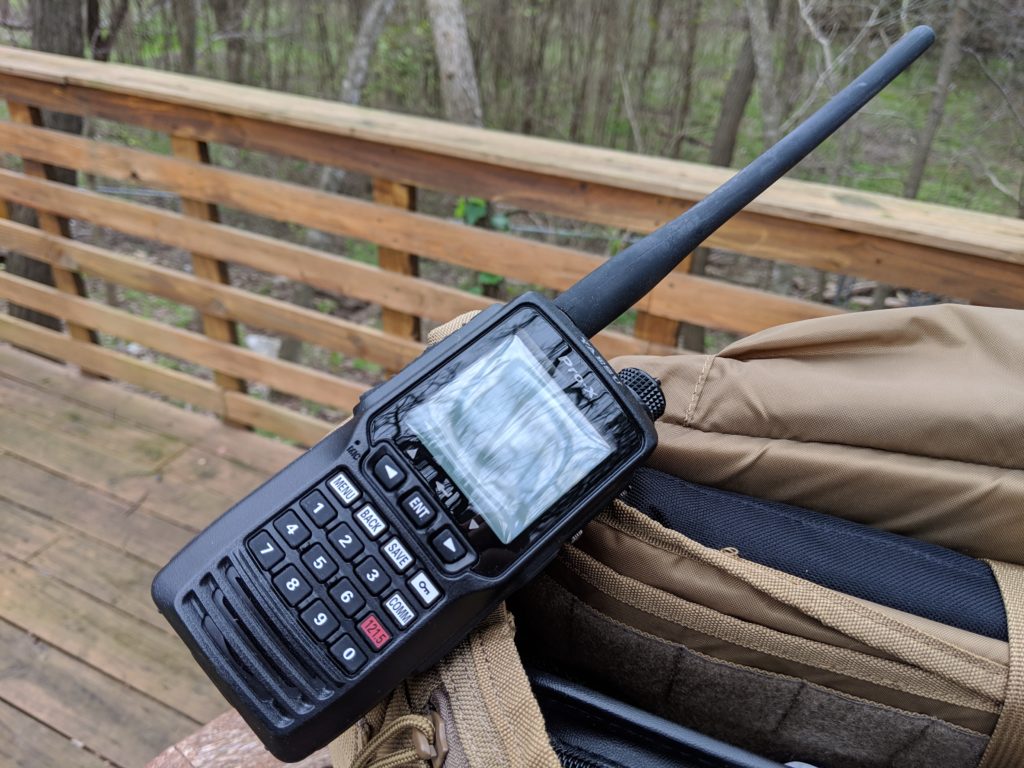
Sticking out of the side pocket I have my emergency radio, a Yeasu FTA-550 air band handheld. I’ve actually found having this really useful, not only can you tune into the ATIS frequency and pick up the latest information before cranking the engine (heck, you can even pick up your clearance if you’re feeling proactive!) but in case your in-panel radio dies you’ve got a backup. I’ve only had to use this emergency functionality once, but it’s more than enough to make the investment well worth it.
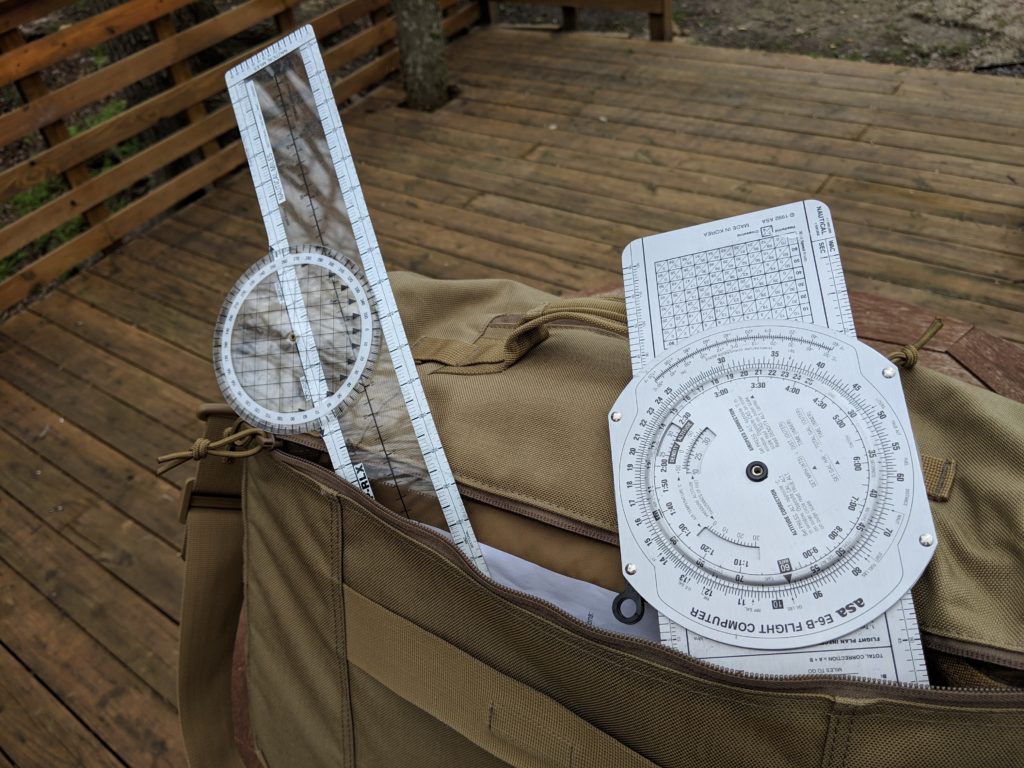
The last thing in my bag are the least used items: an E6B flight computer and a plotter. Sure, my iPad does literally everything that these two items do so much better, but on the off-chance that I’m asked to do some manual flight planning at my biennial flight review I just leave them in the back pocket. To me the knowledge that I’ll have them if I need them is worth whatever small weight cost they pose.
Things I’ve Ditched
Since the first article I’ve gotten rid of a couple things.
- Emergency Medical Kit: Sure, on longer flights I’ll put it back in the bag. But the airplanes I usually rent already have a sufficient emergency kit in the back of the airplane and it seems like a waste of space.
- David Clark Headset: To be fair I’ve swapped it for the in-ear QT Halo, but the larger cans are just plain uncomfortable for long periods of time and not worth the weight and space.
- MyGoFlight Tablet Mount: I’ve moved from a windshield mounted solution to a kneeboard mount for my iPad. Some of this has to do with the fact that the airplanes I usually fly have a serviceable GPS installed that I know how to program so I don’t need the constant navigation help. Some is also because I found out that keeping the iPad on the windshield lets it heat up way quicker in the Texas heat than otherwise. It’s also easier to write on with my finger.