As soon as I left flight school and started renting airplanes on my own, I realized that there was a gaping hole in my basic pilot skills. I could do steep turns and turns around a point without breaking a sweat, but there was one skill that is neither tested on the private pilot practical exam nor is it on the curriculum for many flight schools. It’s a skill so essential in the real world that you will do it every time you go flying. The skill: refueling the airplane. I actually had to look it up online to see how it was done before renting an airplane, and the lack of good resources was a little disturbing. So as an effort to “pay it forward,” here’s the quick and dirty how-to for topping the tanks.
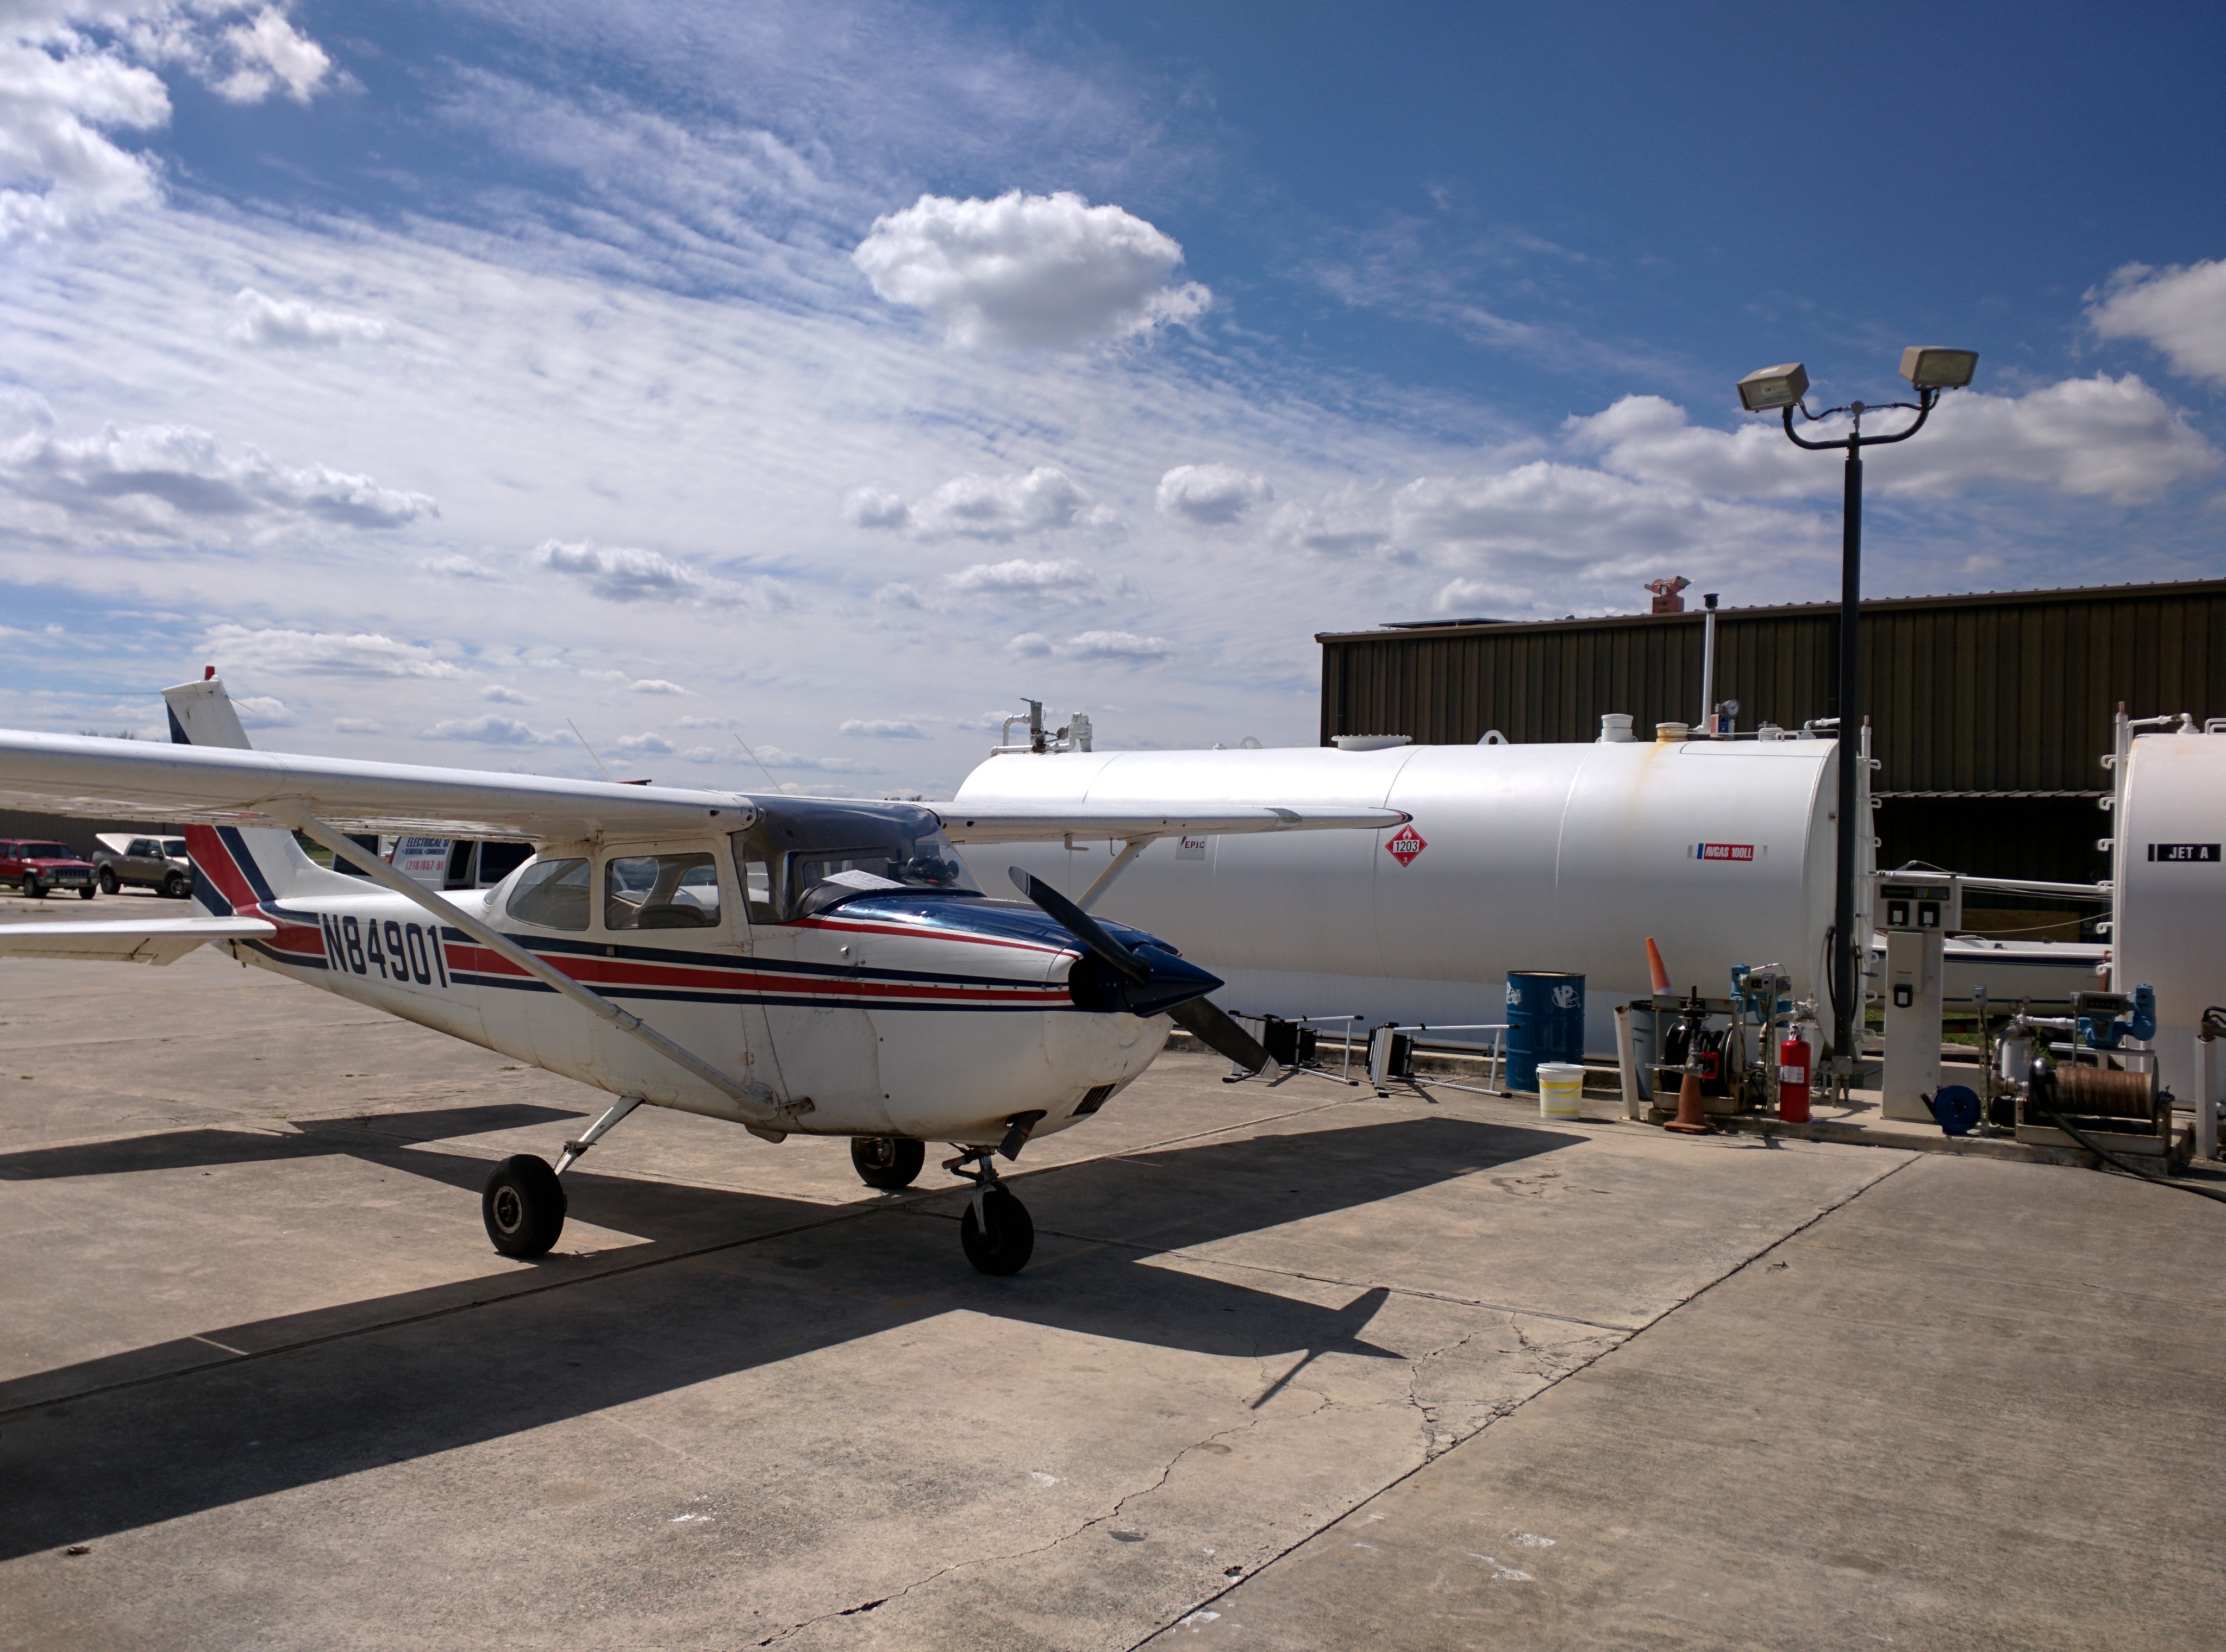
Some of the fancier FBOs will have a full service fuel guy and fill the airplane for you. But for the vast majority of the FBOs where you rent airplanes, you’ll be expected to brim the tanks before handing the keys to the next guy. The first step will be identifying the fuel tanks on the field, and taxiing up to them. There should be some markings on the ground indicating where you should park your plane for proper placement, but in general there are two positions for fueling.
- Parallel Fuel Pumps will allow you to drive the plane up to the pump just like you would a car at the gas station, and drive off when complete. You should take caution to keep your wing about 5 feet from the tanks, and stop with your propeller parallel with the pump itself.
- Nose-In Pumps will typically be in a smaller cul-de-sac off the taxiway and require you to stop with your airplane facing the pump itself. You should stop about 10 feet from the pump. Be aware that you will need to push your plane backwards for a bit to give you enough room to drive away.
For example, the fuel pump at Boerne Stage is a parallel pump (the one used for this article), but the pump at Stinson Field is best used nose-in due to the short turning radius required to sneak out once fueled up.
Once you have parked the airplane (fully shut down, mags cold, master switch off, all that good stuff), you can start prepping for the fueling.
There should be some sort of alligator clip on a string somewhere around the fueling area. This is the “Grounding Wire” that will ground your airplane. Spinning propellers, the friction of wind over the wings, and electrical components can all create a static electrical charge on the airplane that continues even after touching down (the wheels are rubber and rubber is an insulator, remember?). Since we are about to open a large tank of fuel and pour some more gas inside, its a good idea to make sure everything is grounded so no errant sparks turn your pretty white airplane into a charred and blackened burning husk.
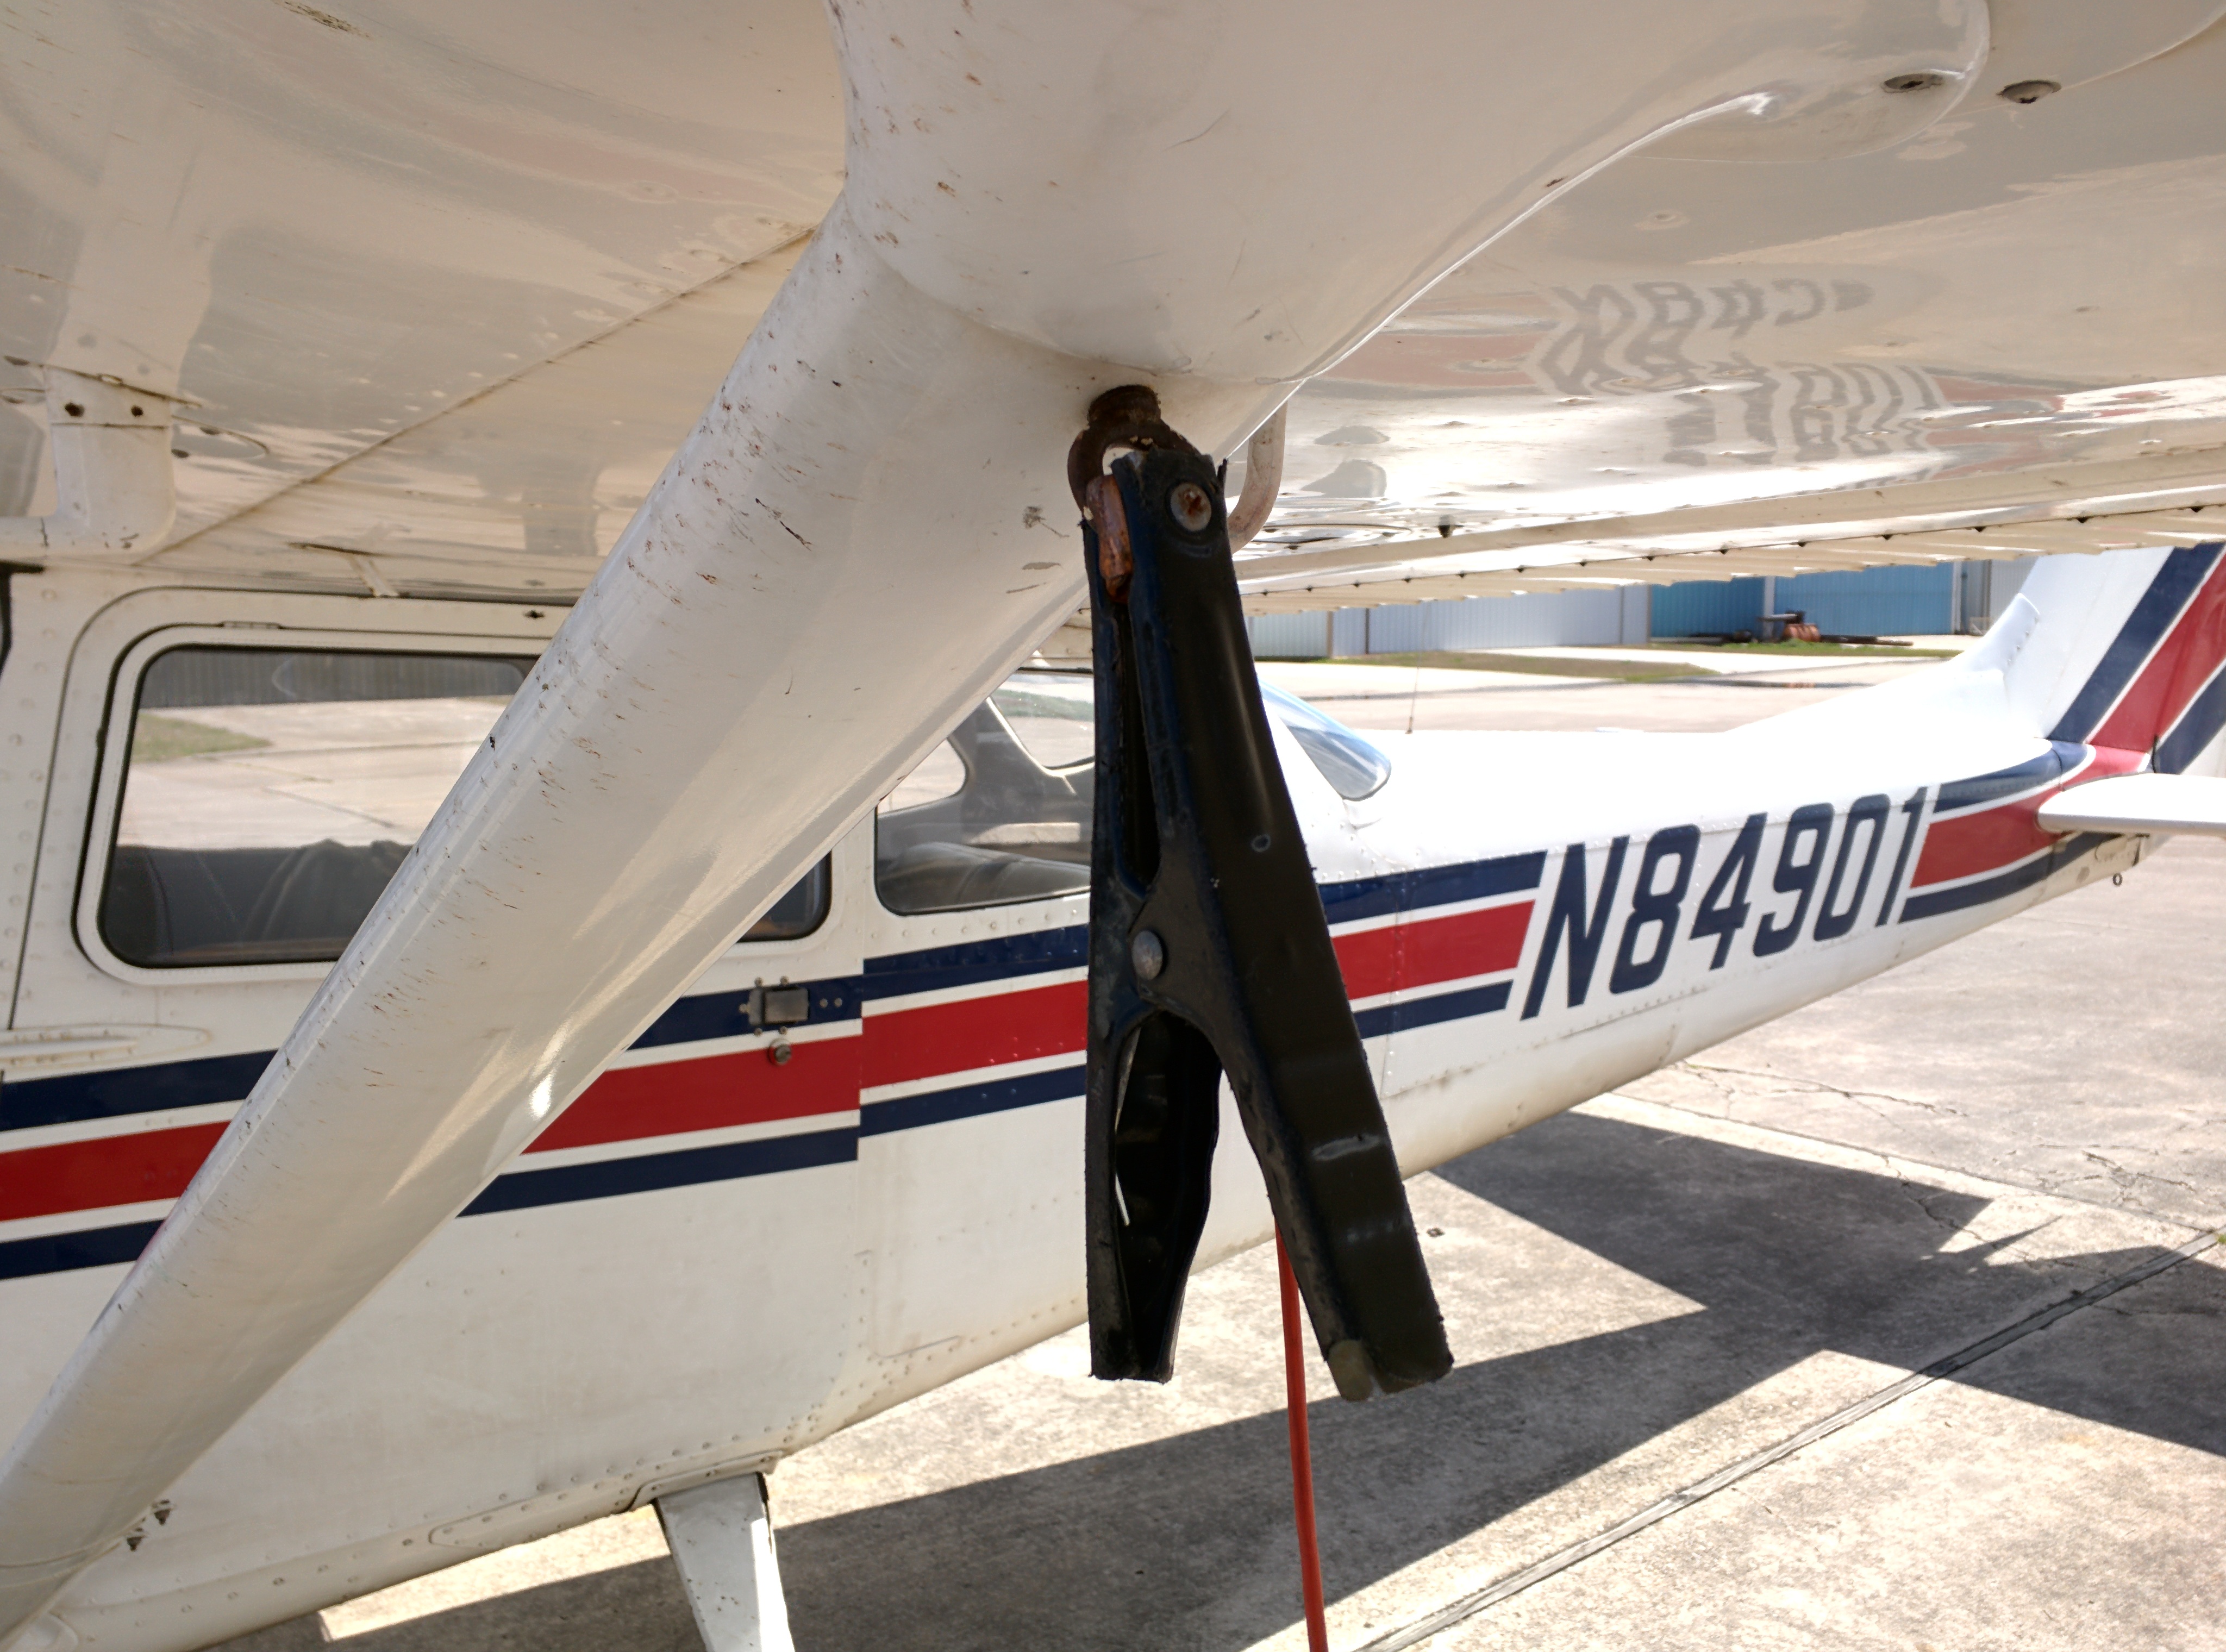
The grounding wire should be connected to any conductive metal part of the airplane’s structure. If your tiedown rings are steel (which these are), then that works just fine. The default position is the exhaust pipe on the bottom of the engine, although it can be (A) hard to reach and (B) very hot.
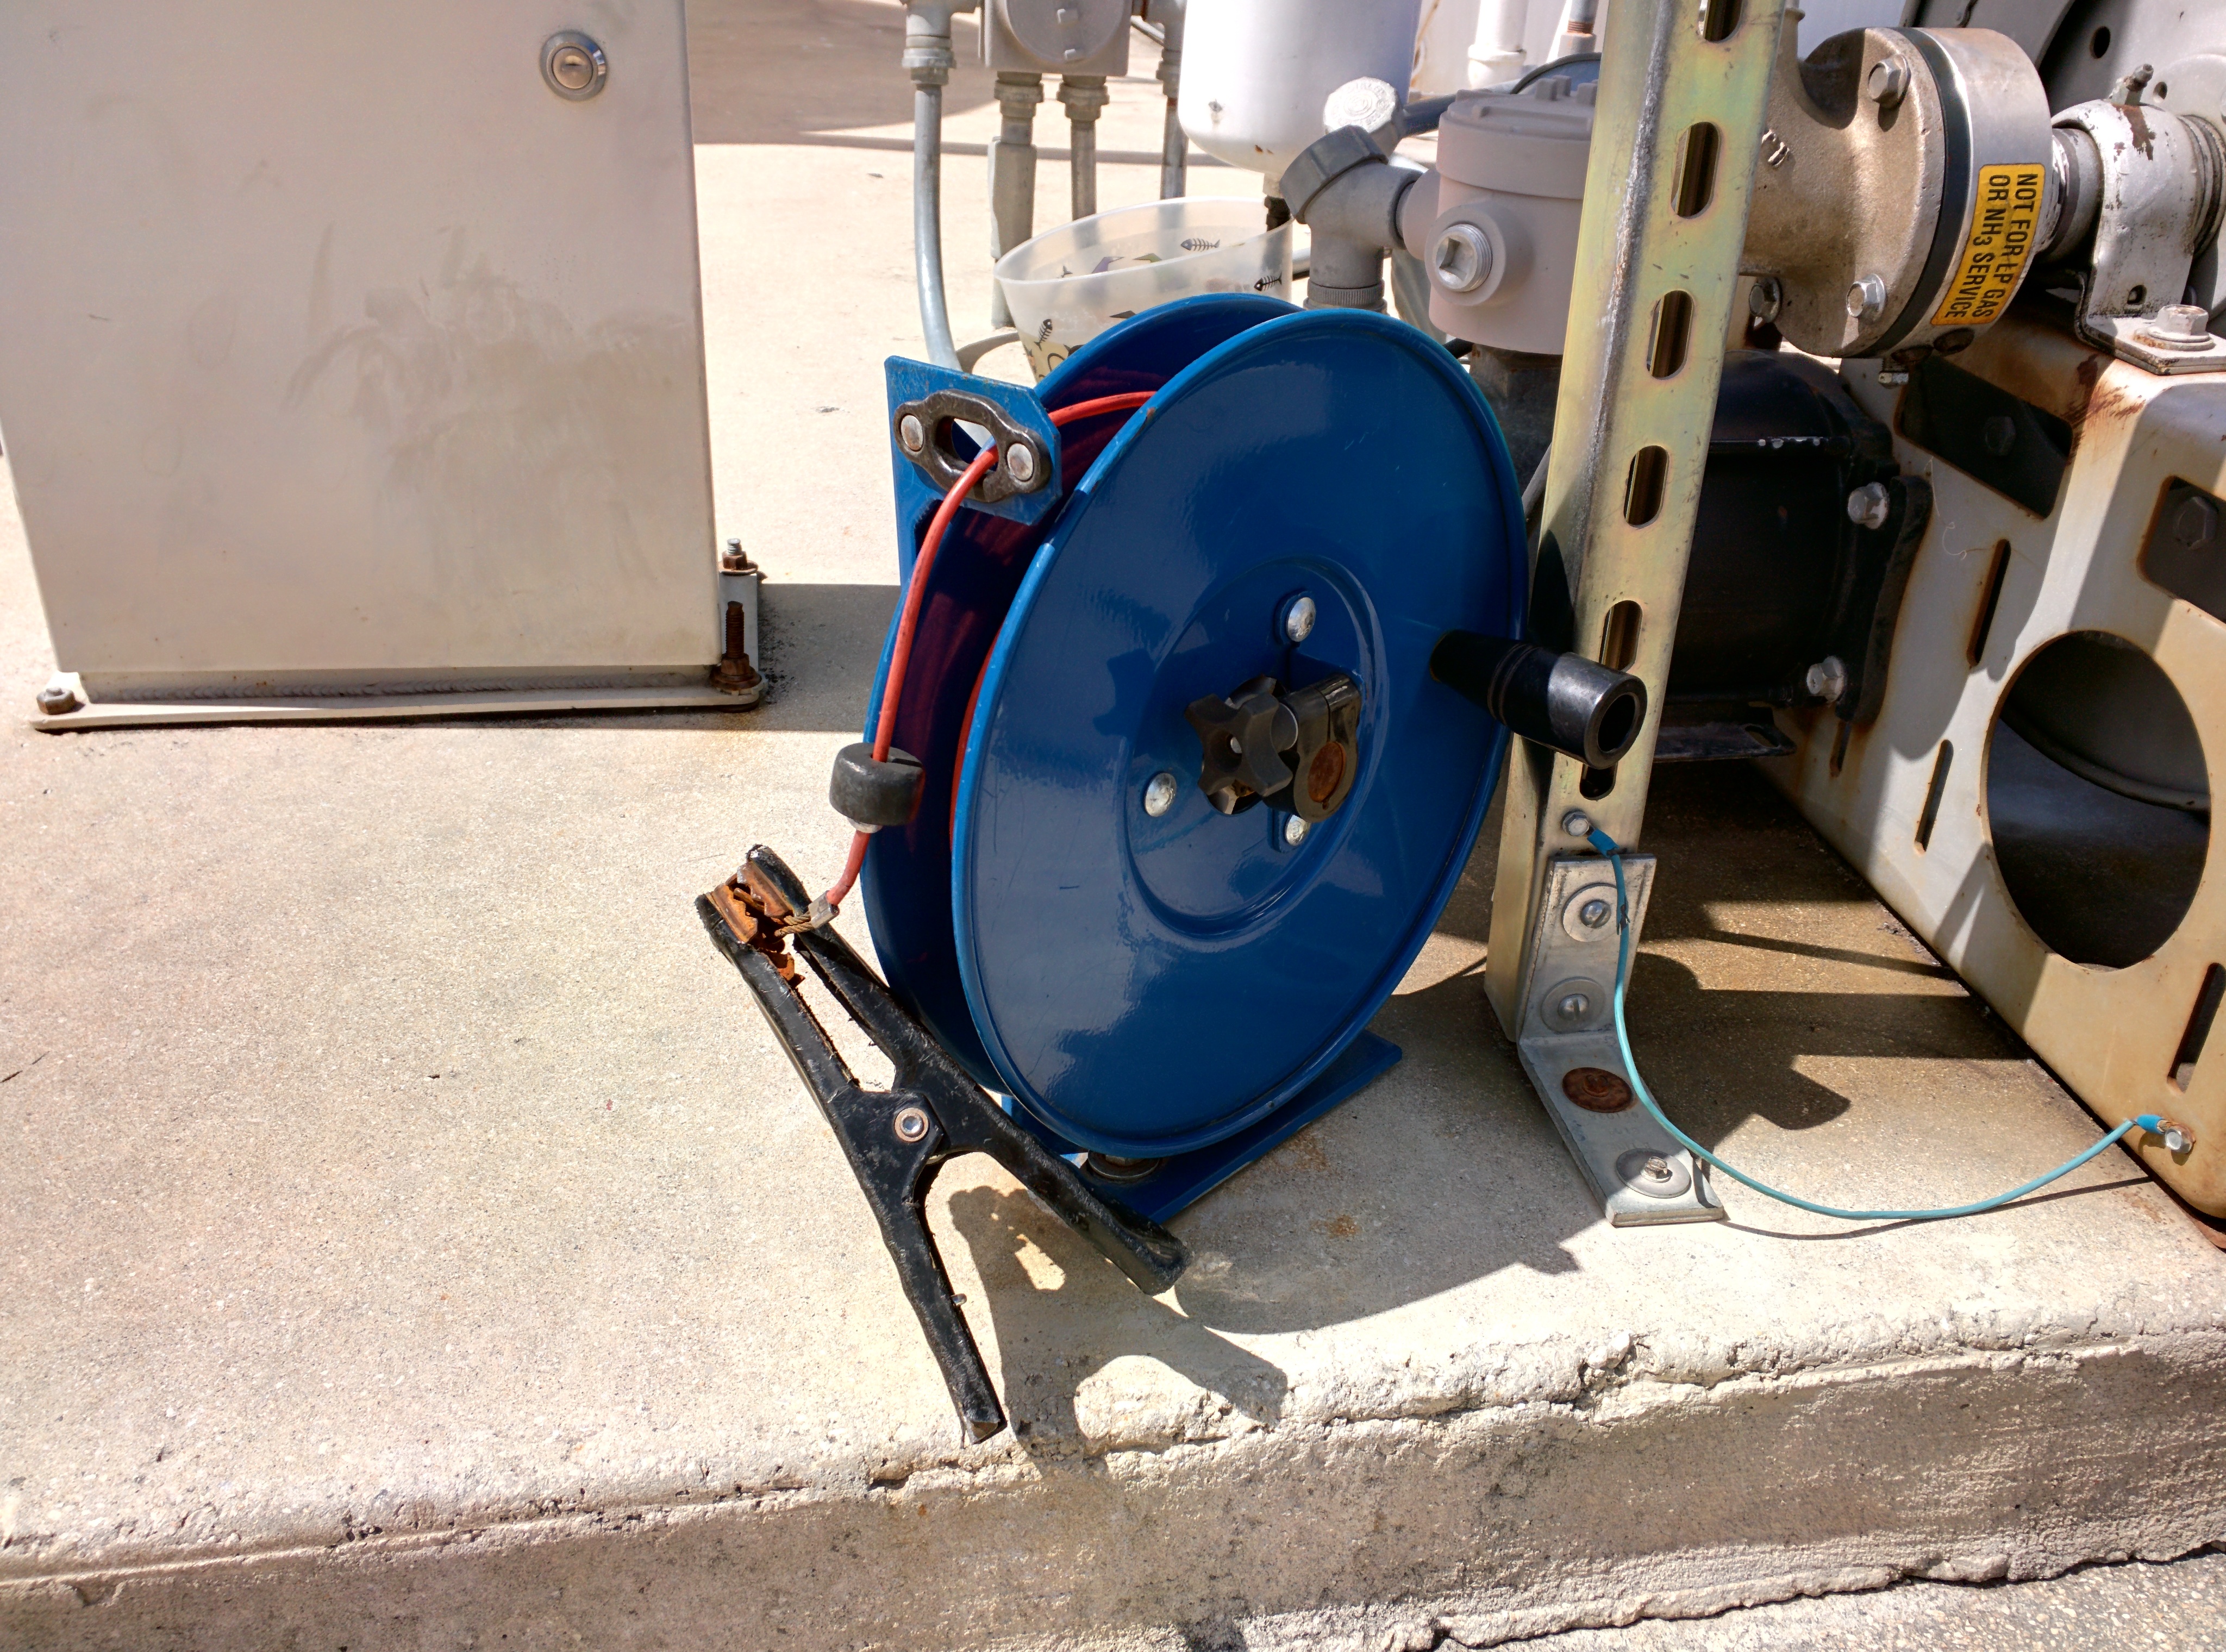
Once the airplane is grounded, we can roll out the hose.
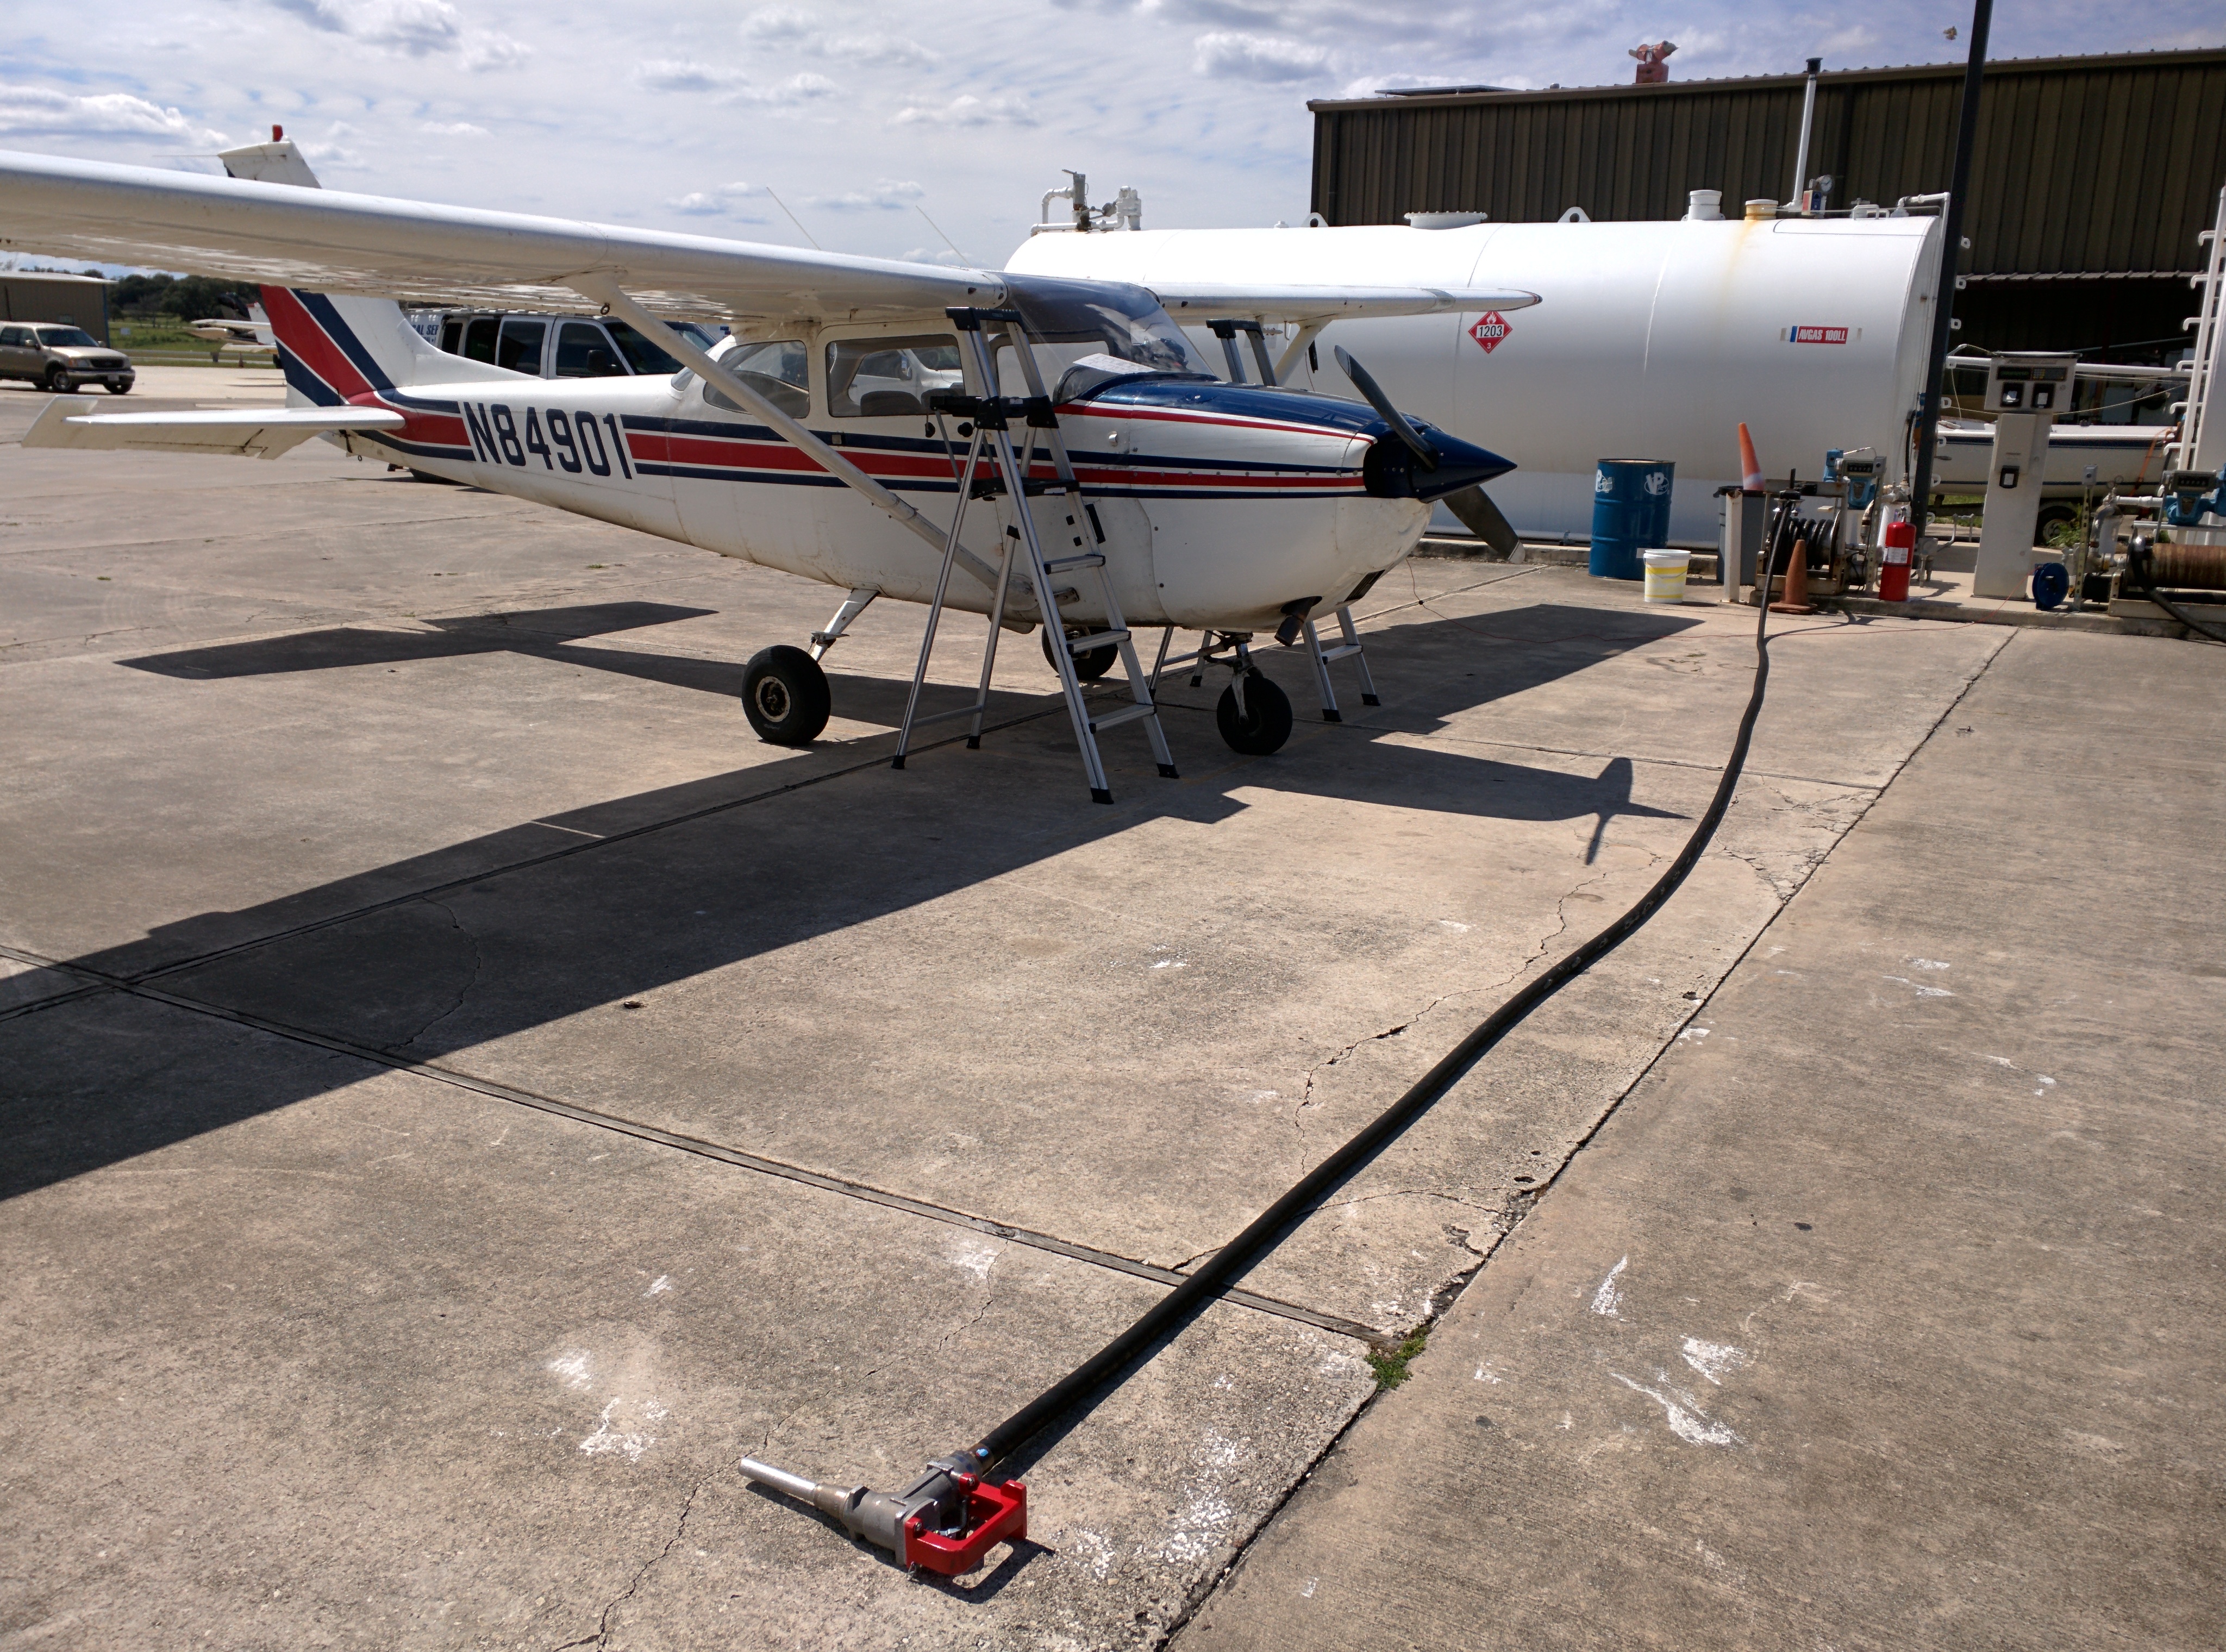
Rolling out the gas hose before you even touch the pump panel is very important. Fuel pumps have a timeout set on them — if you don’t pump any gas in a given period of time, the pump turns off and you need to enter all of your payment details all over again. It can be a royal pain in the butt. To make it easier, make sure that everything is in place before you get started.
The perfect length of hose to roll out is basically the length of your wings. That length of hose will give you enough slack to reach both wing tanks easily and without needing to stop and roll out some more.
While you’re near the pump hose spool, go ahead and reset the counter on the pump as well.
IMPORTANT NOTE: Make sure that you roll out the hose for the CORRECT FUEL TYPE. Some self-service locations will have tanks for 100LL and Jet-A collocated, so if you don’t pay attention you might be pumping straight kerosene into your tanks. A mistake which would be very unfortunate, and has caused many fatal crashes in the past.
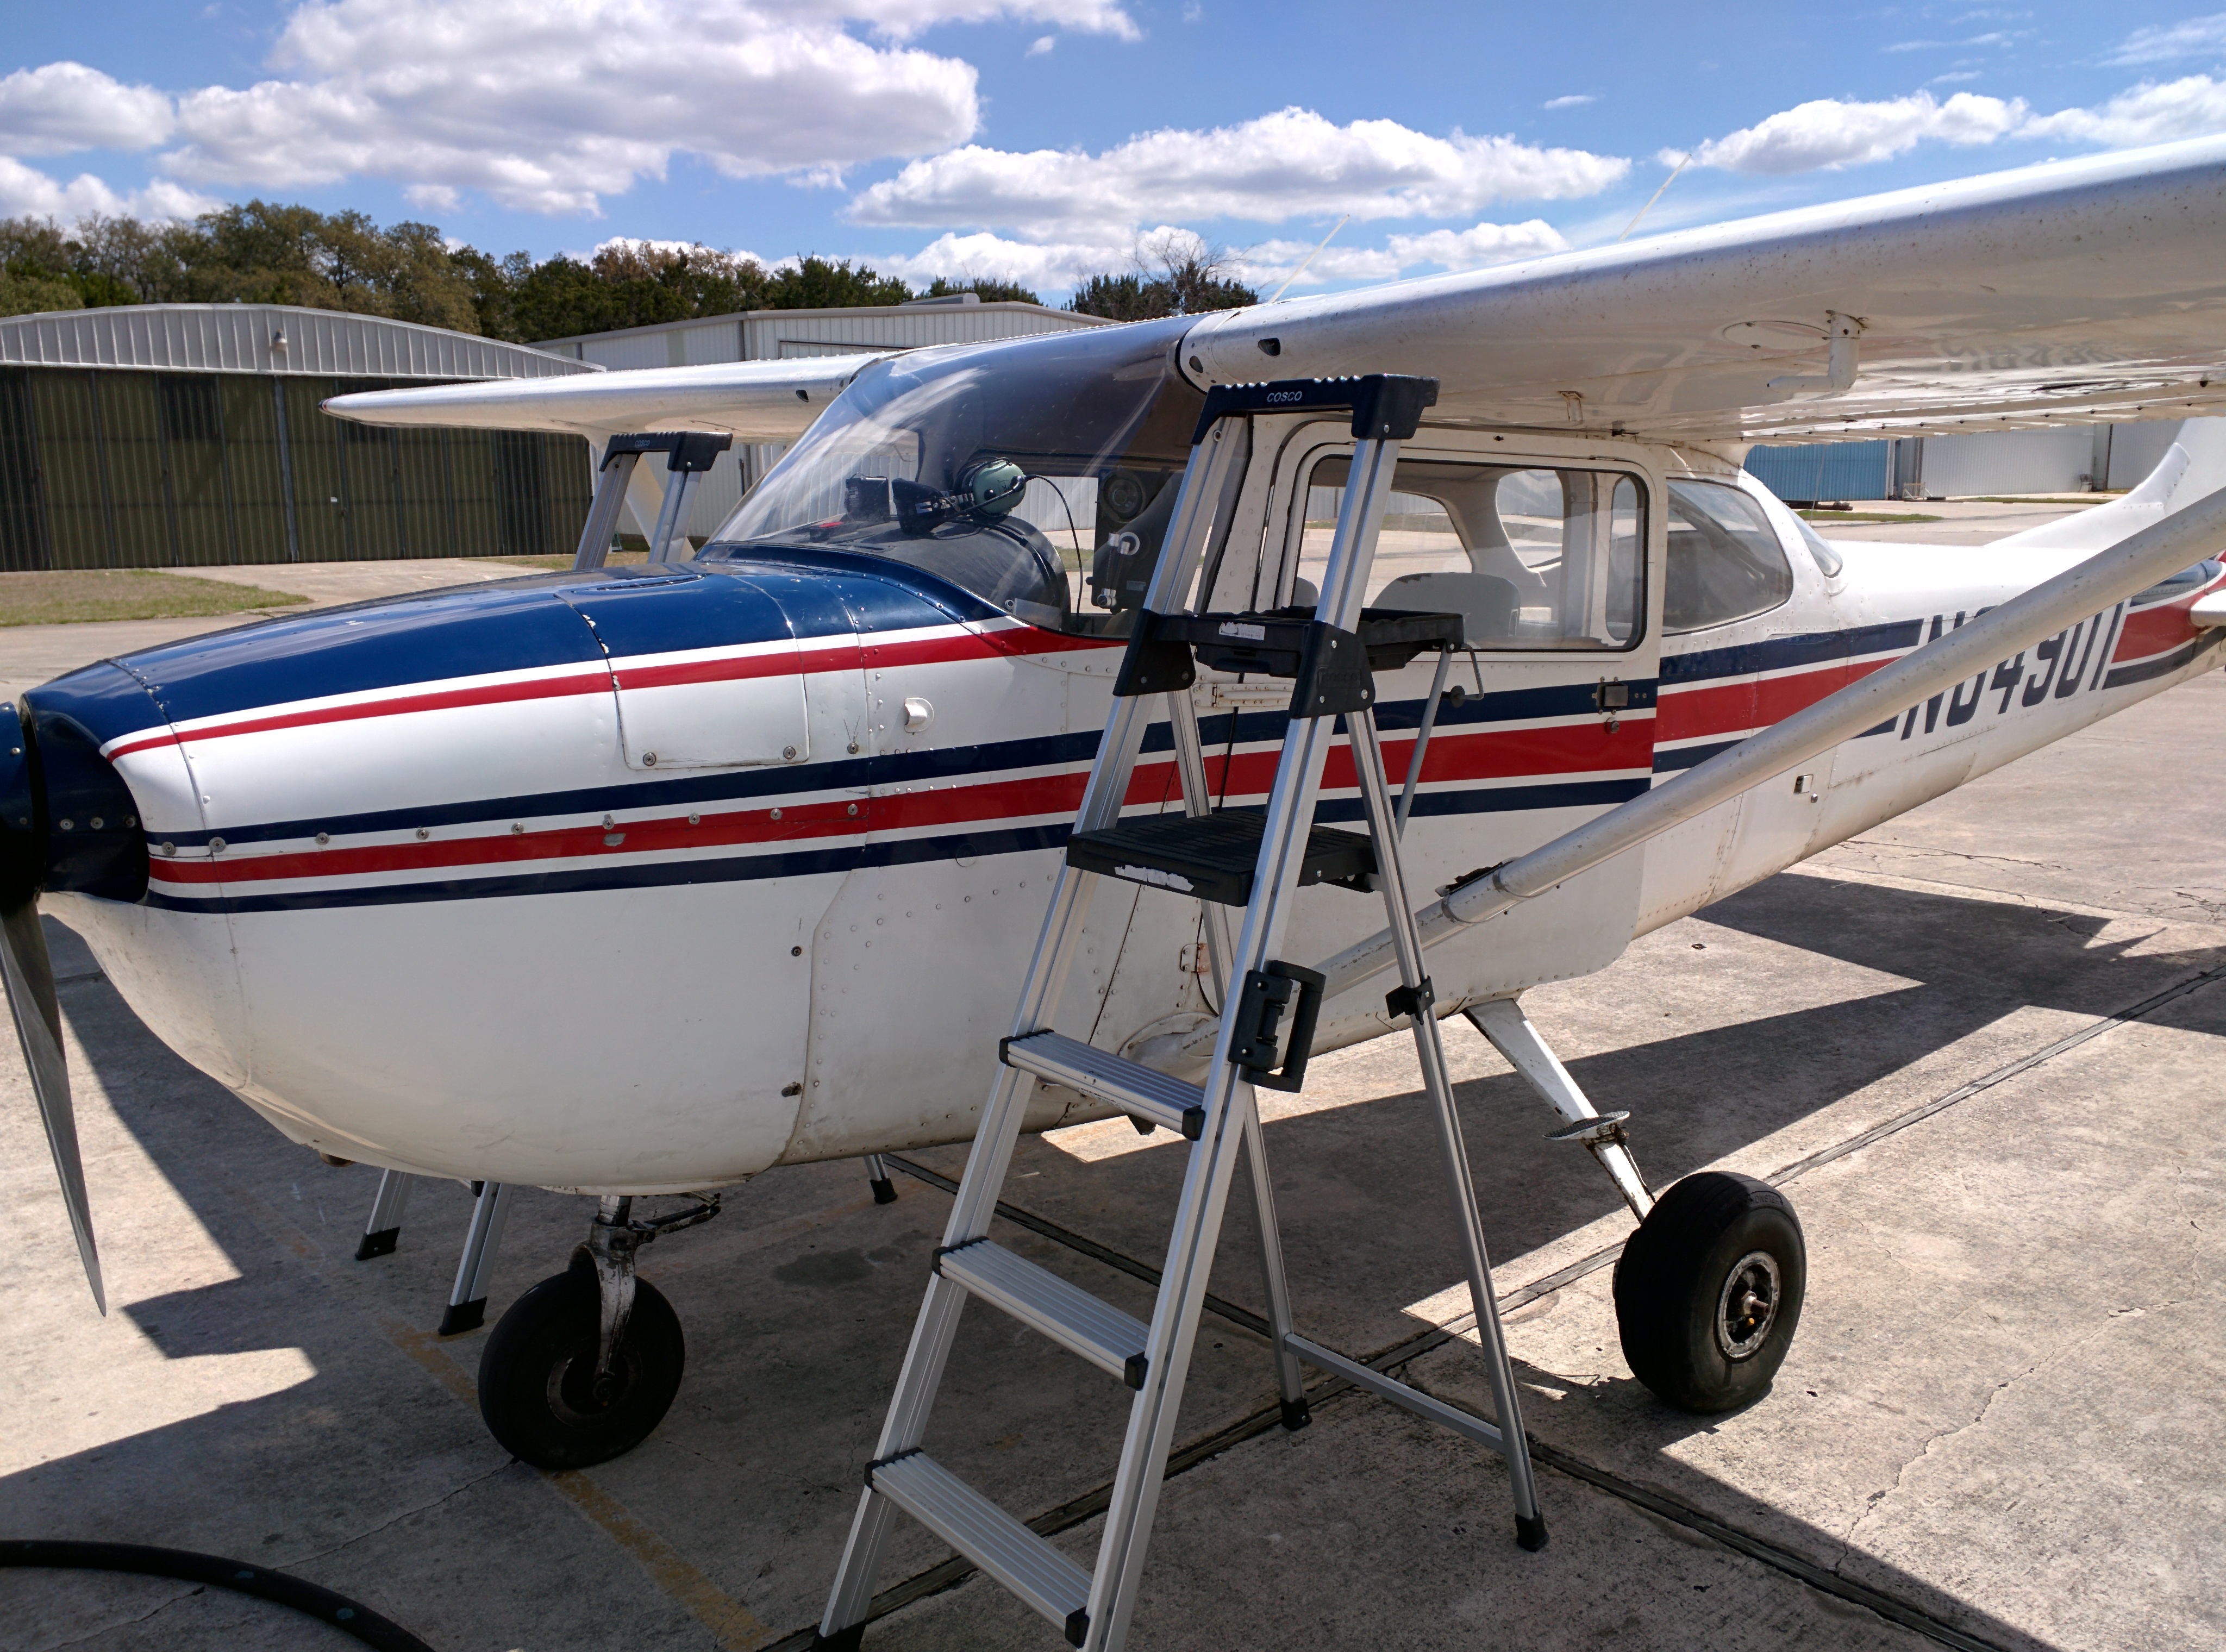
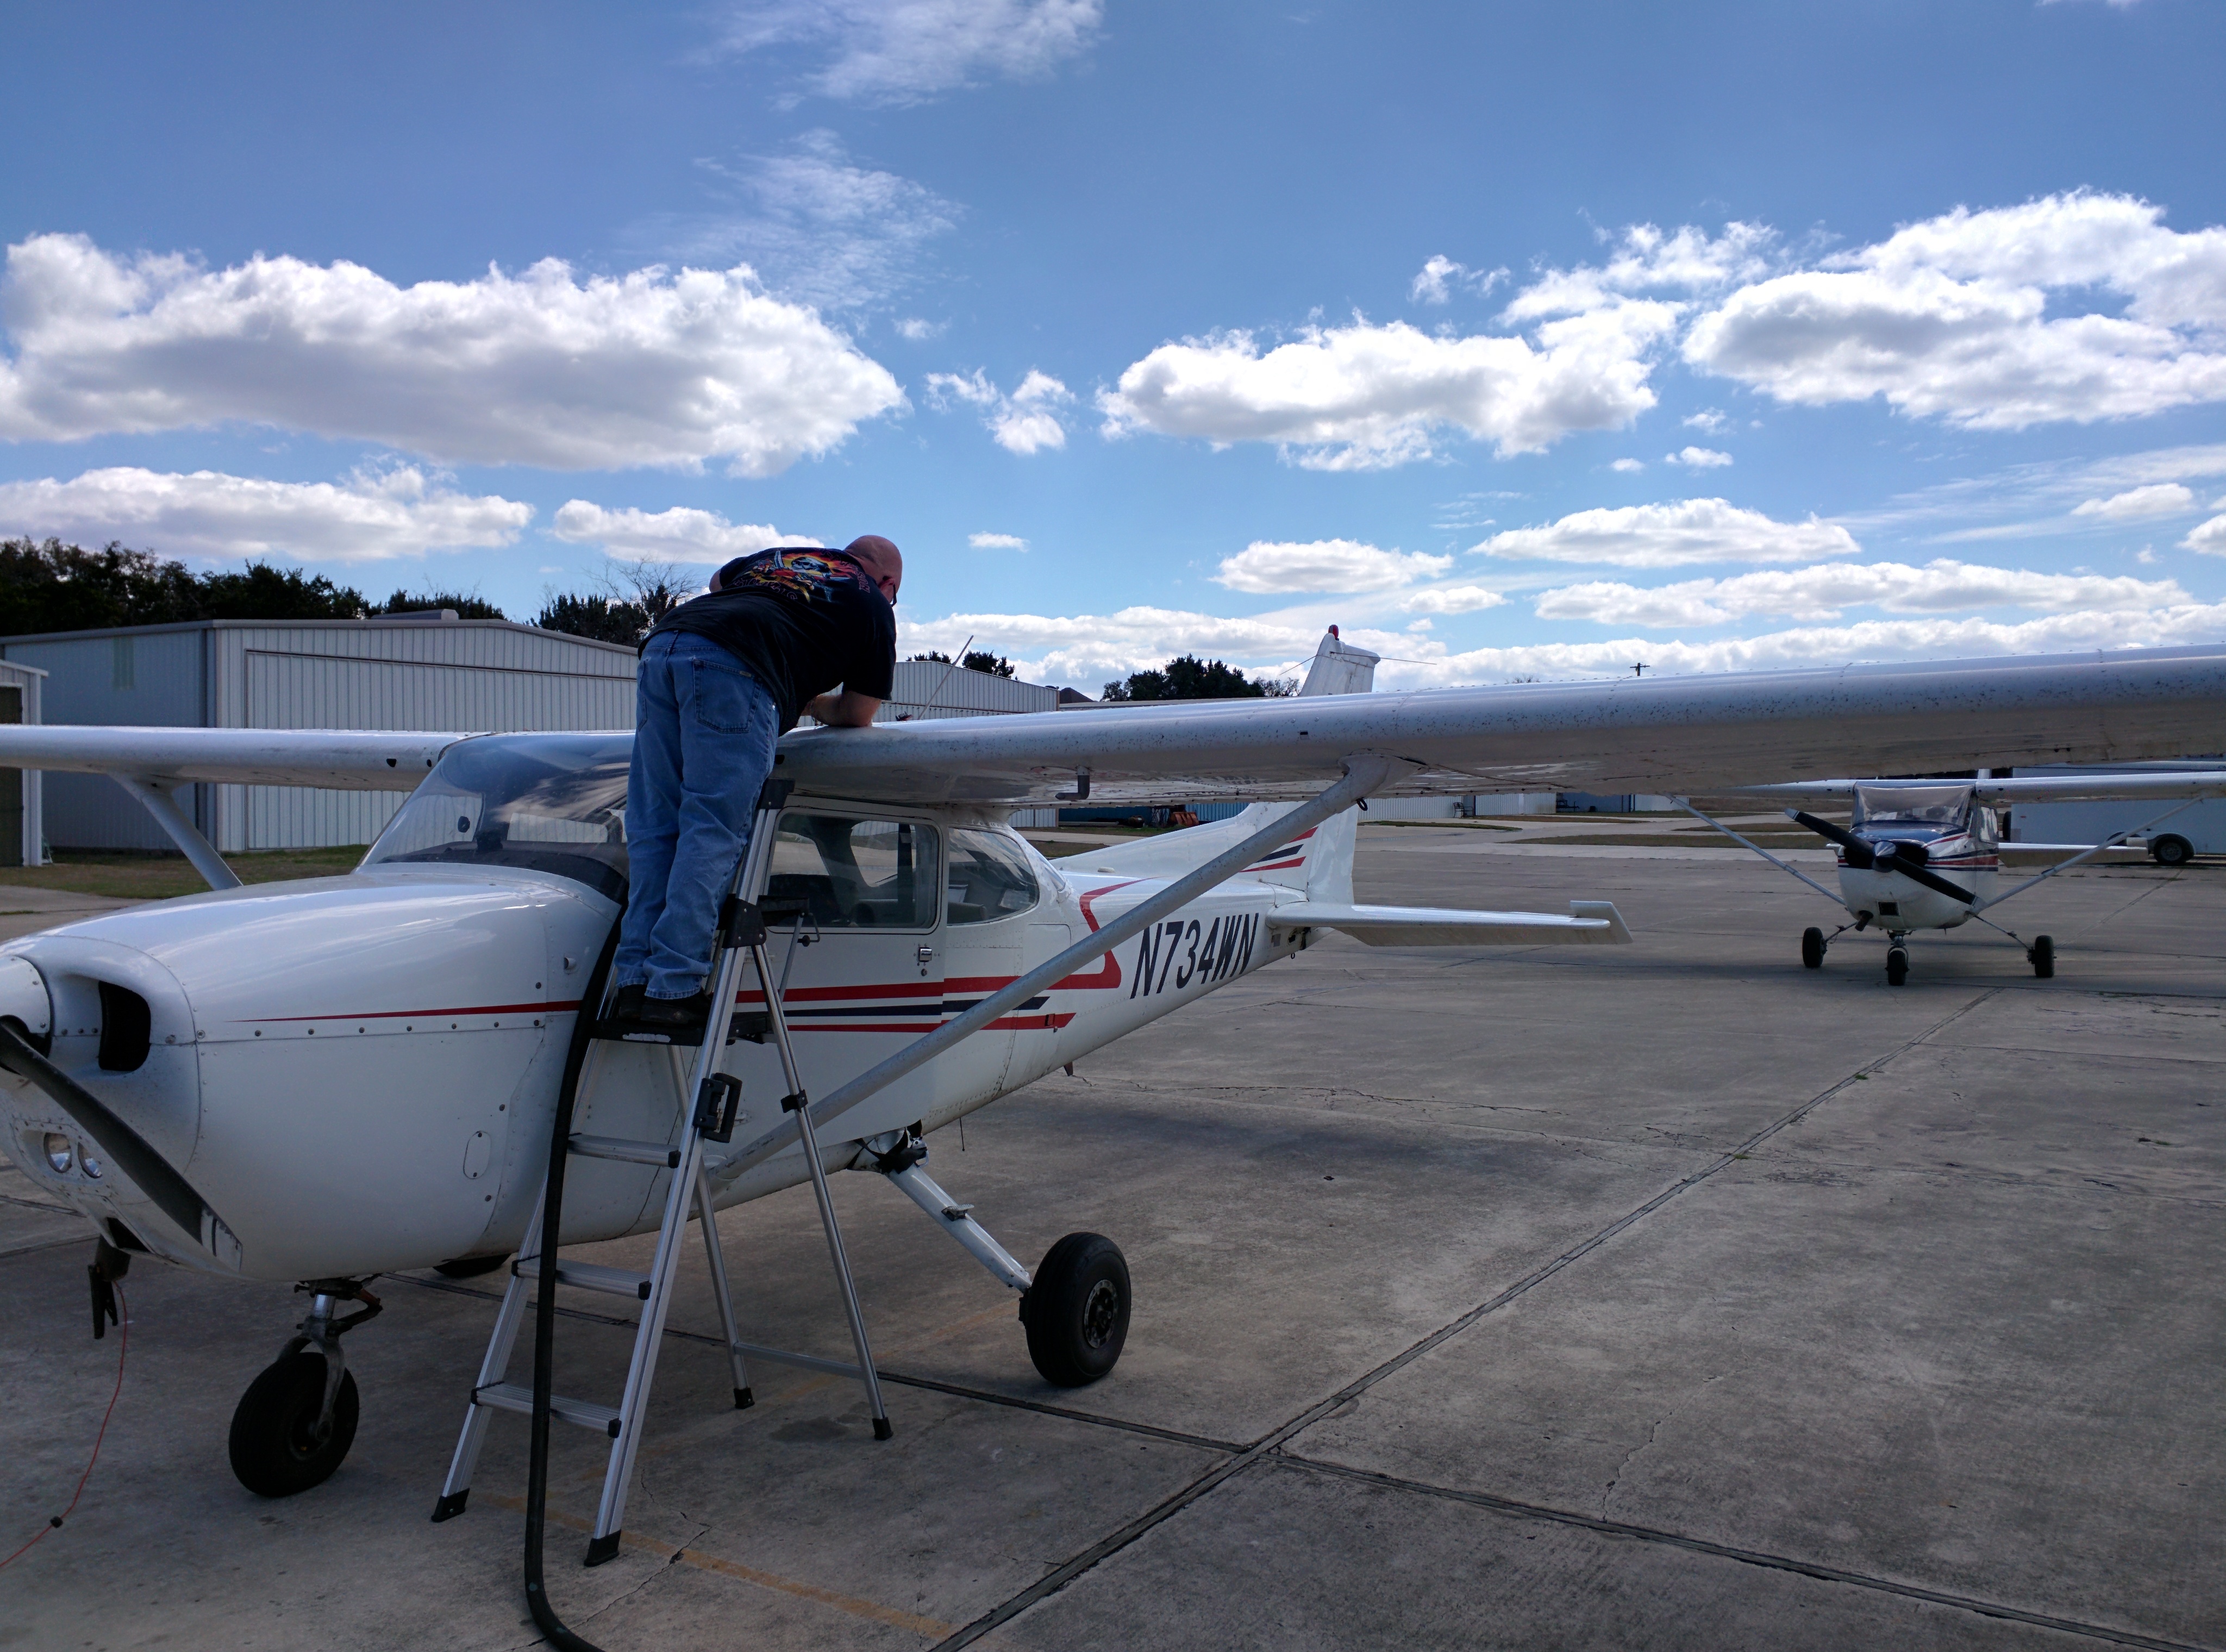
The final (optional) step is to set up a ladder or two. If you’re in a Cessna, you should have some handy steps on the side of the fuselage that allows you to hoist yourself up and get at the fuel caps. For low wing airplanes, this step might not be needed at all. Some FBOs will have a stepladder or two on the side of the taxiway to make fueling easier, but if not you’ll need to use your ingenuity.
Now you’re ready to get the pump rolling.
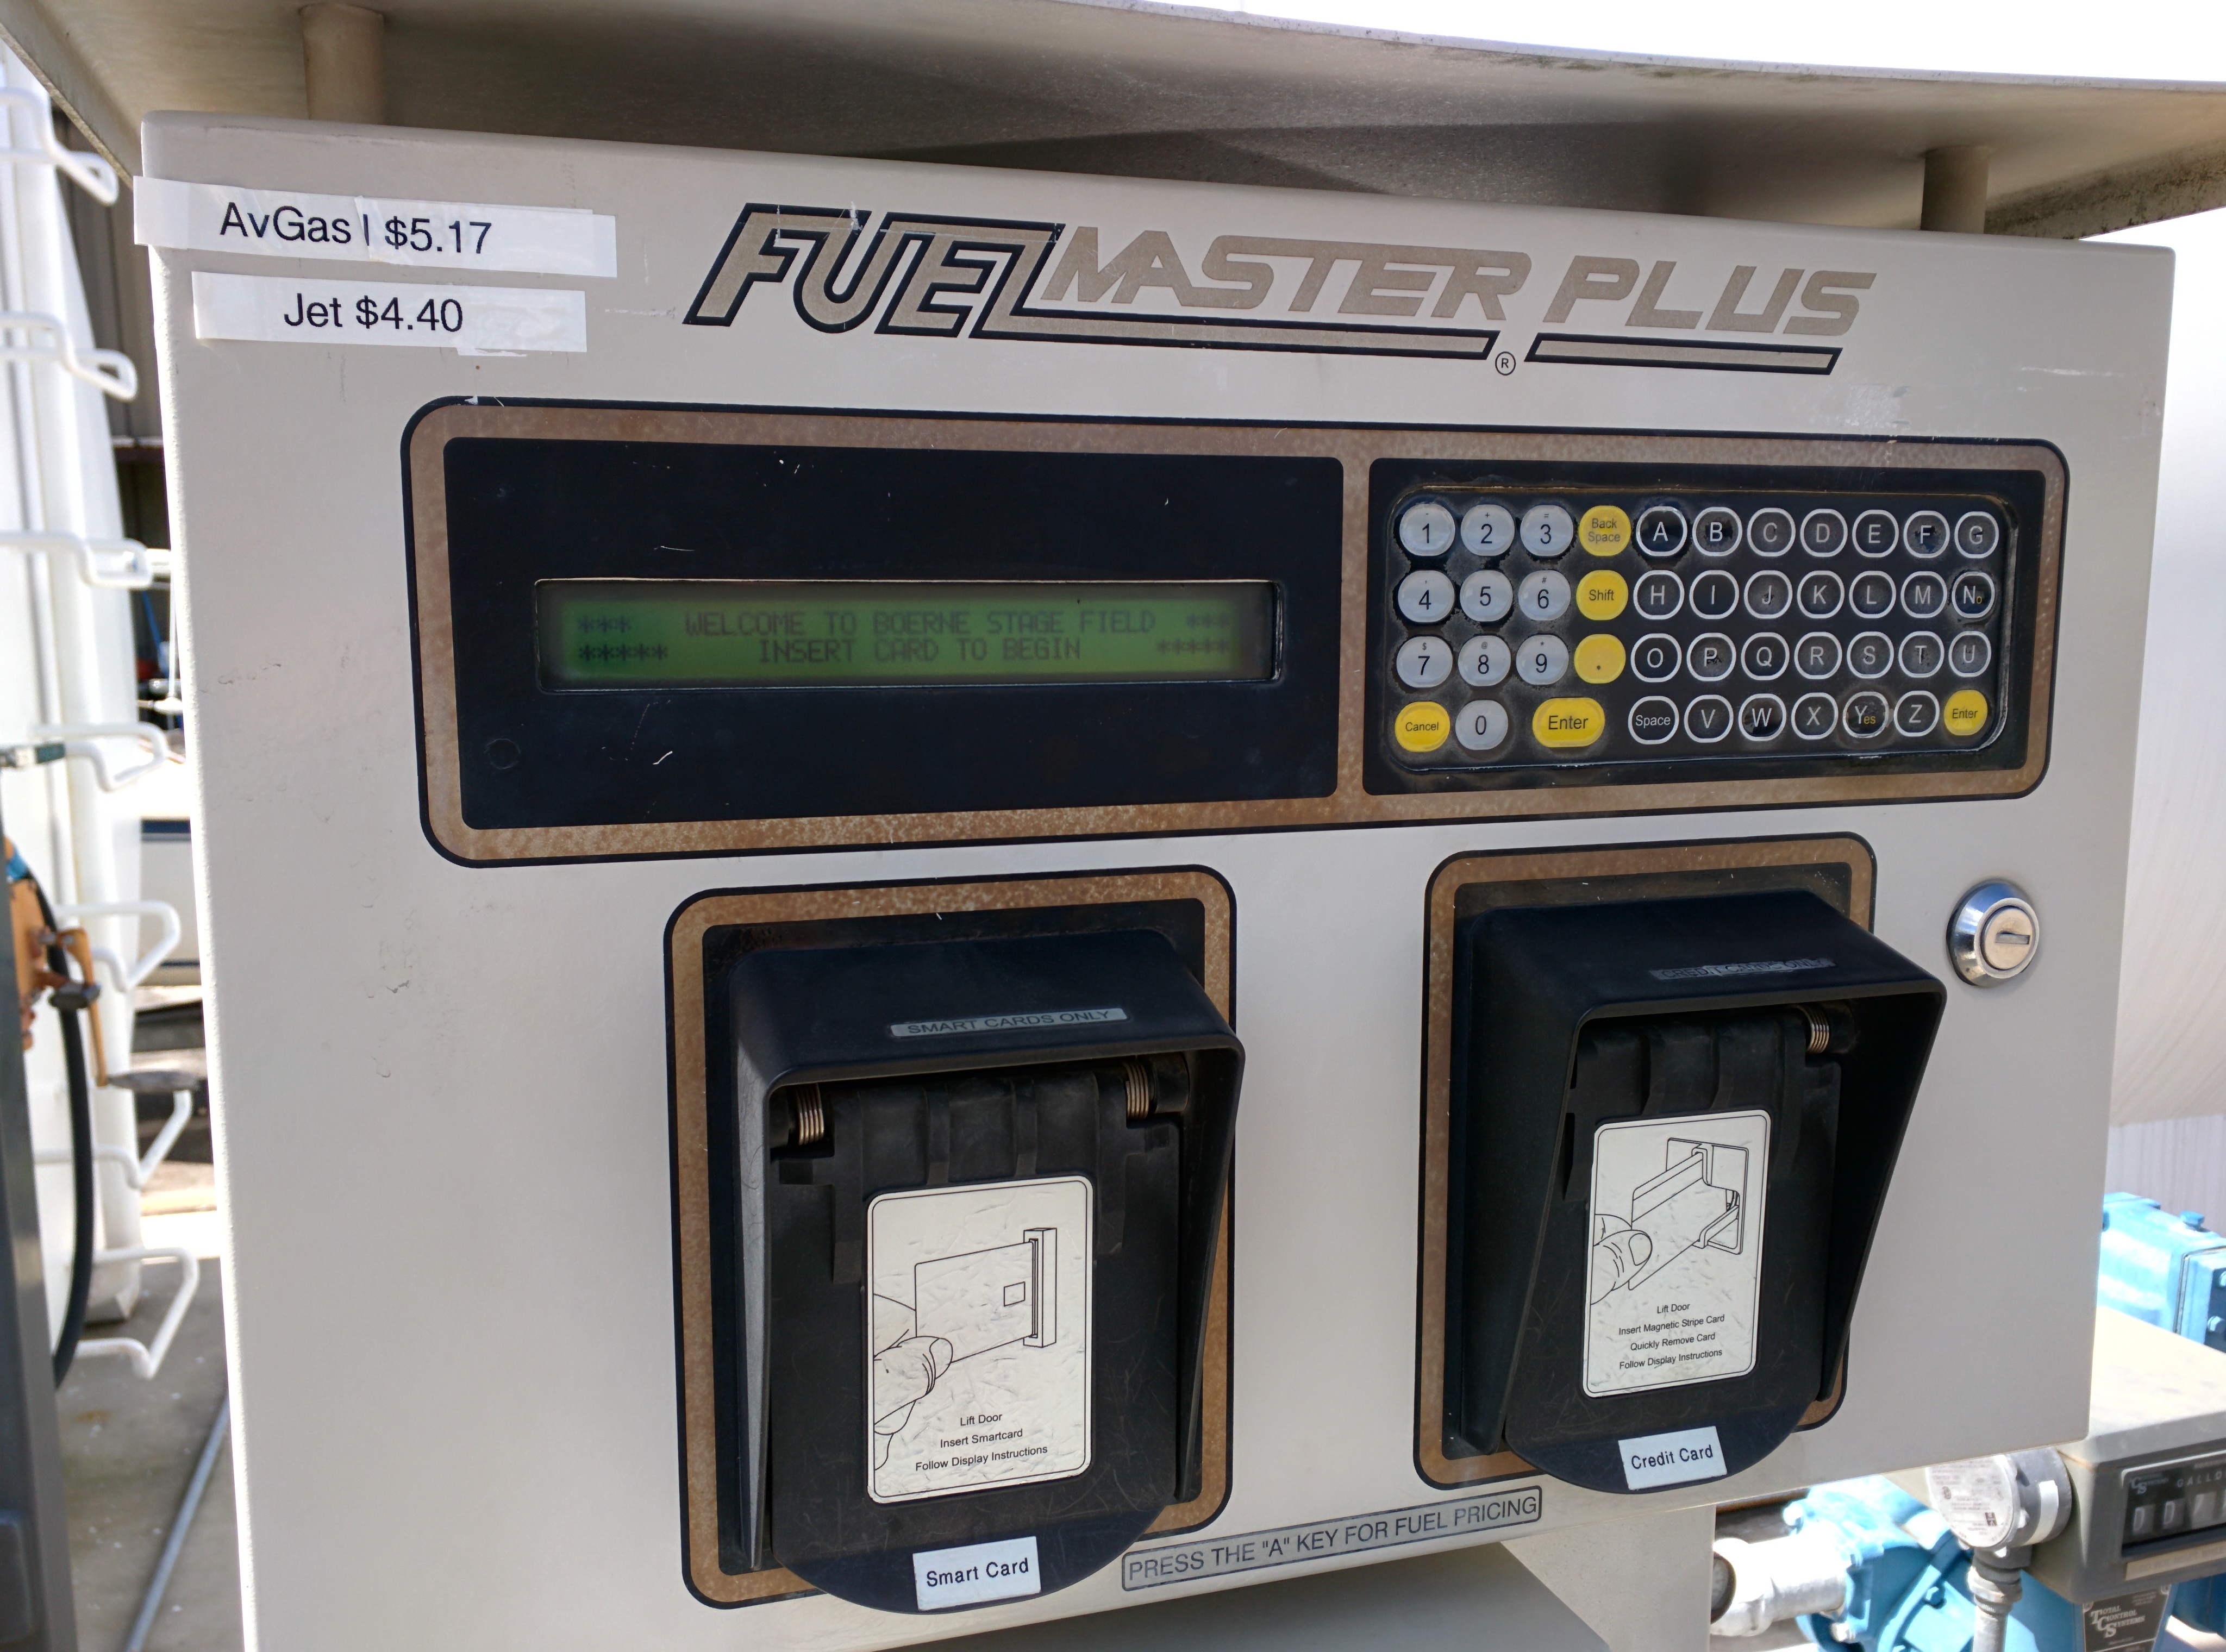
The actual pump interface varies from location to location. Some times you’ll need to enter the total quantity of fuel you want before you start pumping. Other times you’ll be able to pump as much as you want and the system will bill you later. Almost without fail you’ll be able to use a major credit card to make the purchase, and local clubs might have a supplemental billing system (like the “Smart Card” slot above) to make things easy.
Either way, the automated dispensing system will walk you through the purchase just as if you were buying from a regular auto gas pump. You may need to enter your tail number, so just FYI.
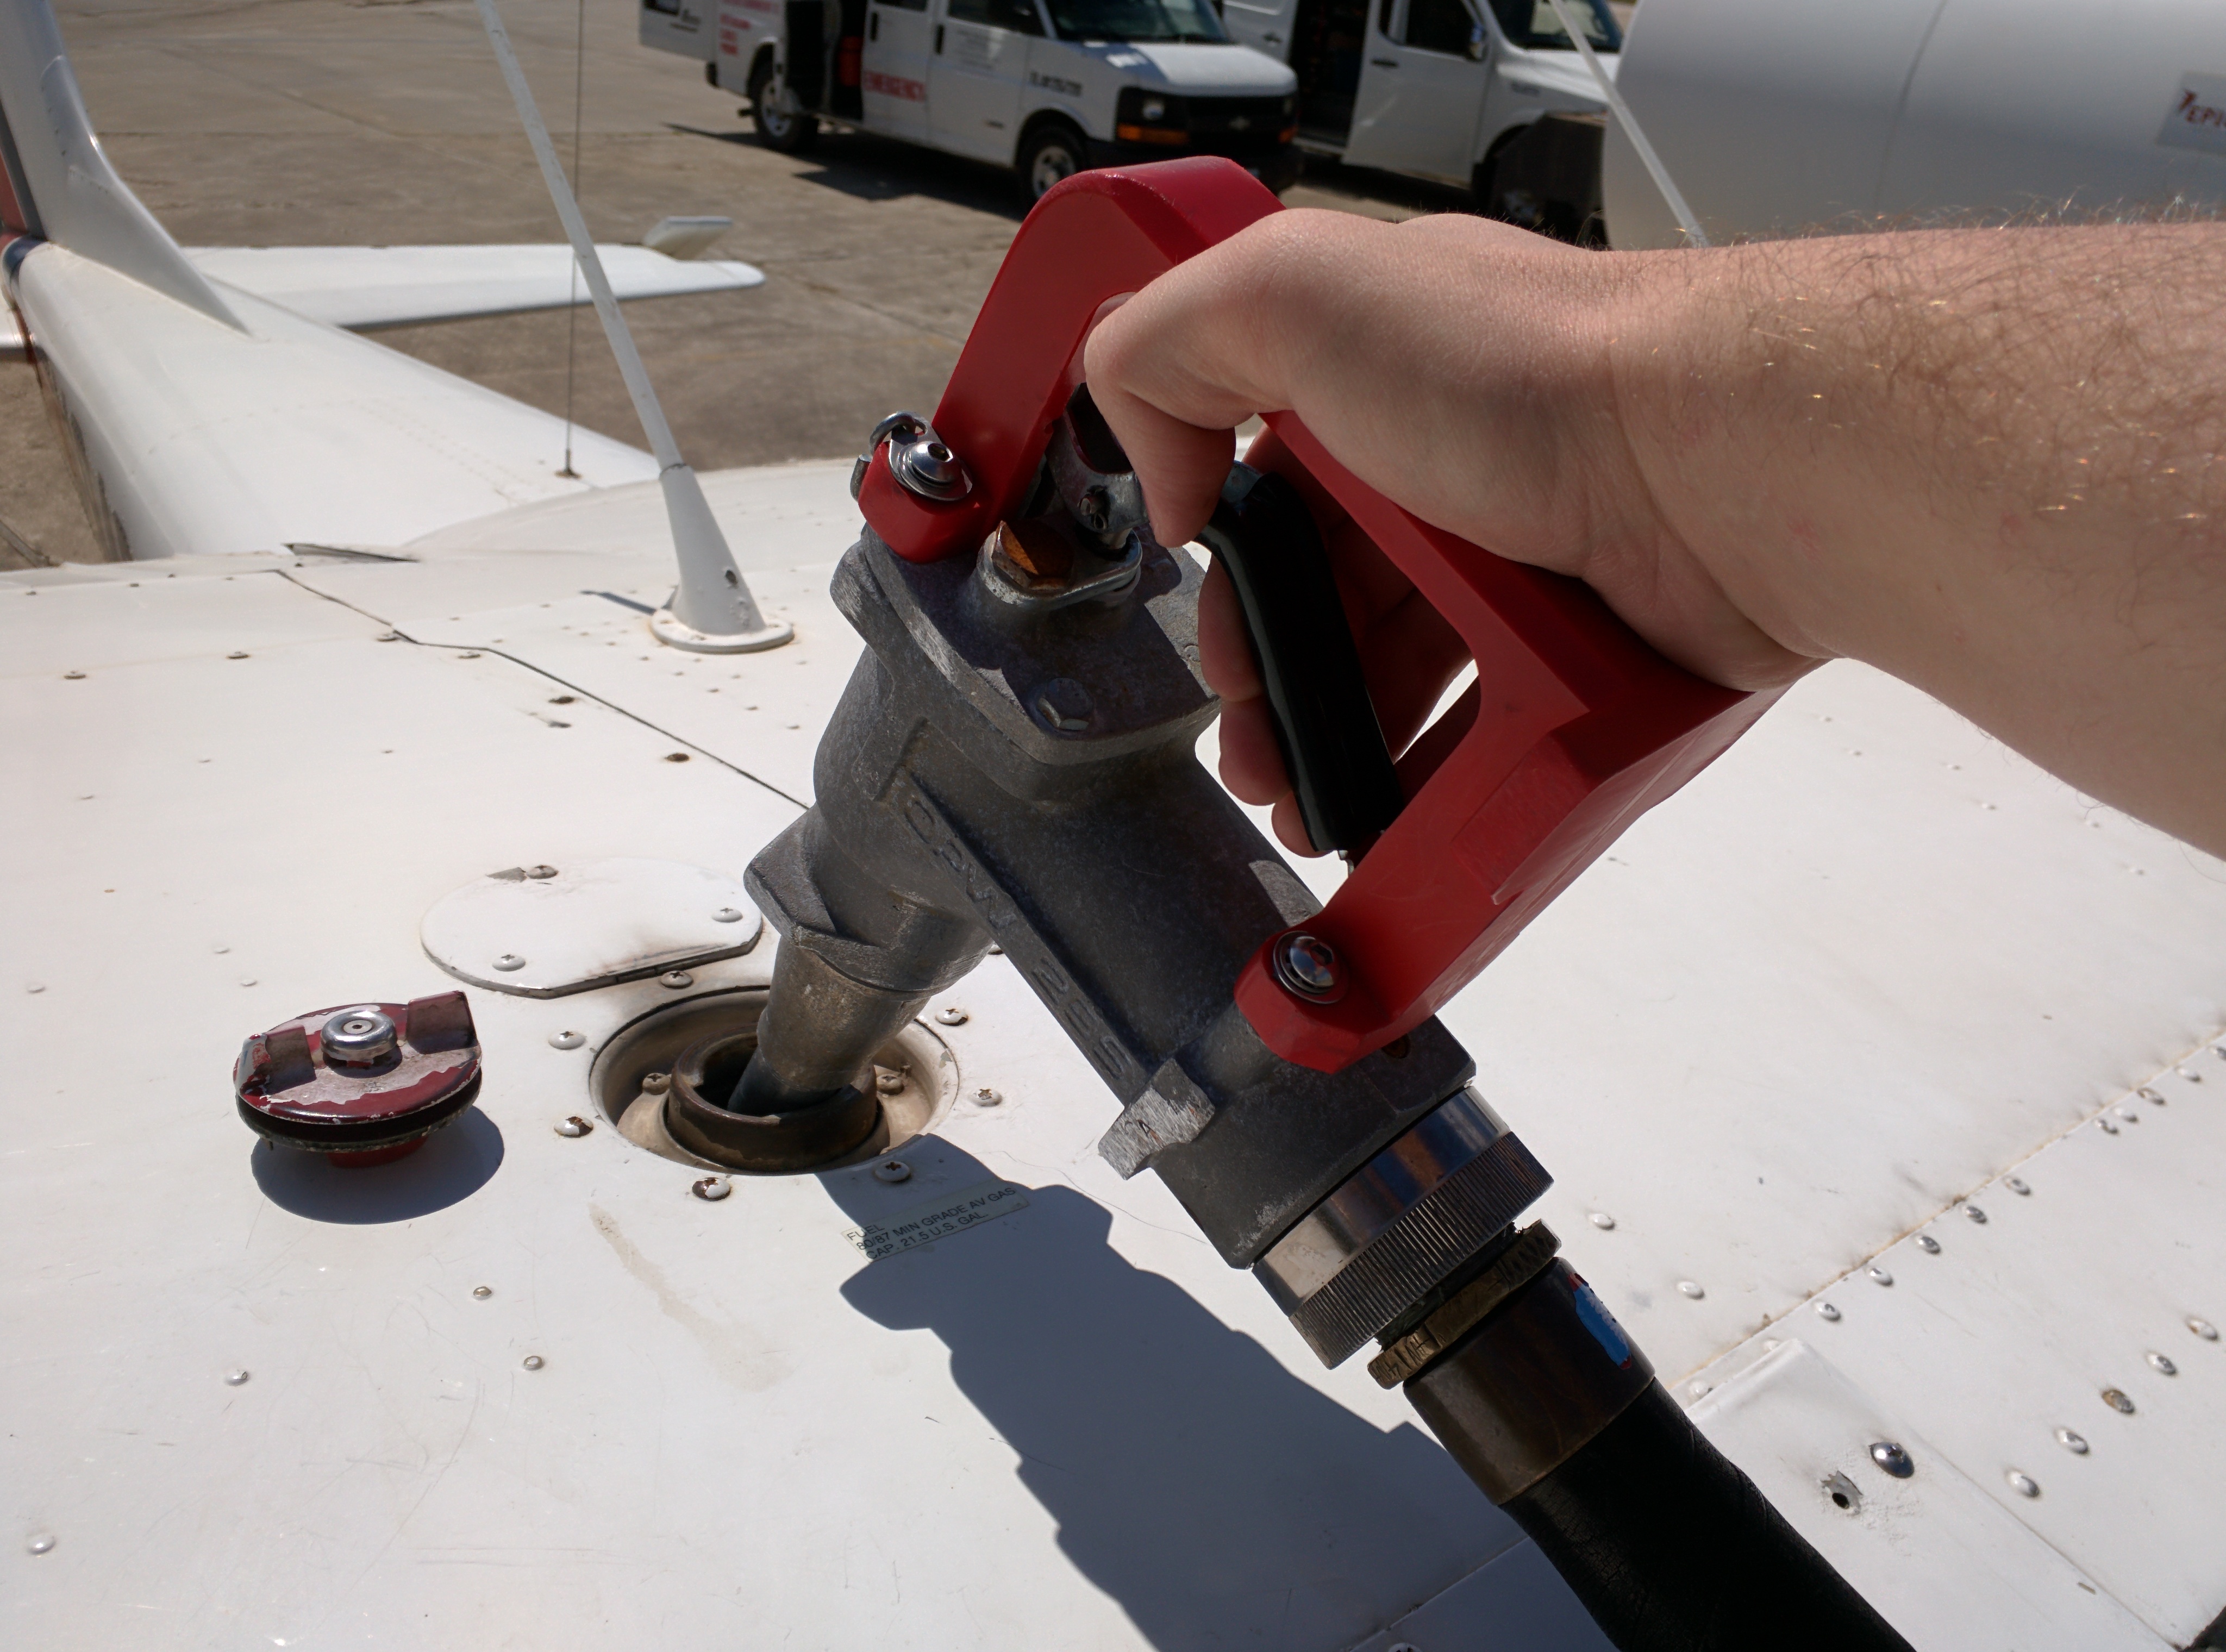
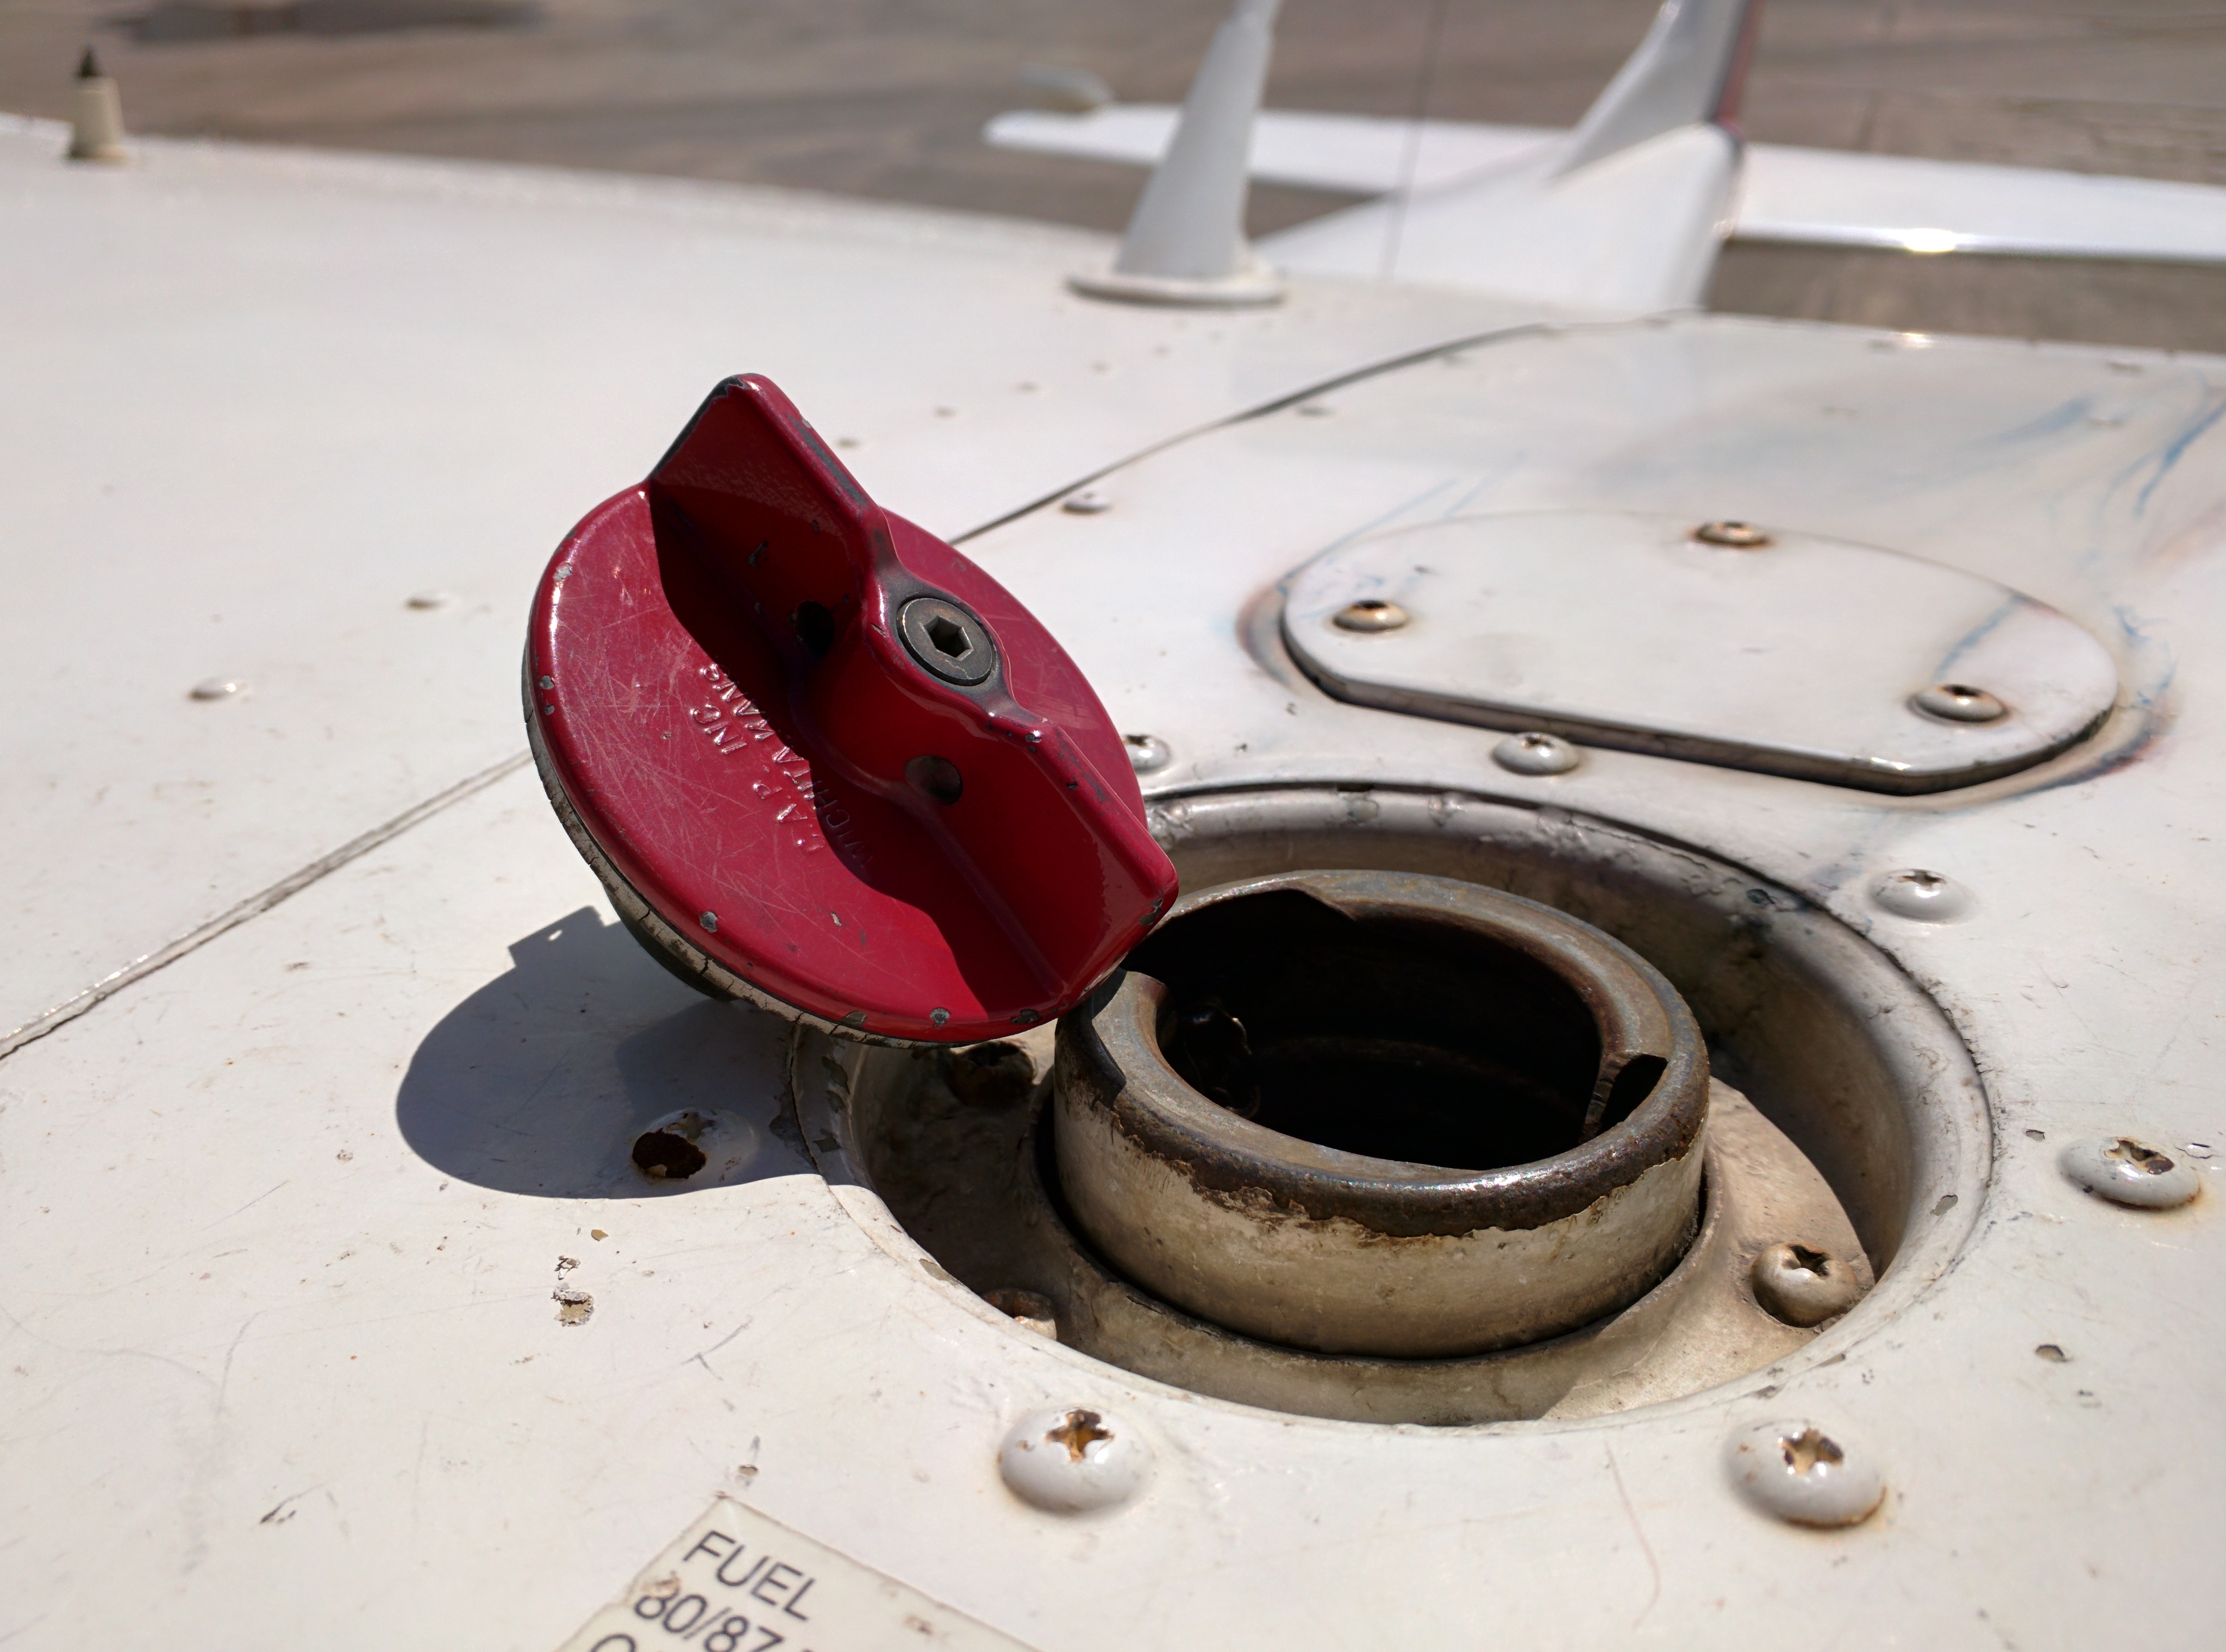
Now that the pump is rolling, we can finally fill the tanks. Head up the ladder with the nozzle, open the fuel tanks (if you can’t do that much you might not be ready to fly an airplane), and stick the nozzle in the tank. Be sure to keep the nozzle in contact with the side of the fuel tank neck at all times in order to provide another point for grounding and prevent sparks.
The trick here is that you need to visually watch the tank fill up through the filler neck. Auto gas pumps can shut off automatically when they are full, but airplanes don’t work that way. Over-filling the tank can not only cost you money, but it will leave a bright blue streak on your wing long after the fuel has evaporated and can cause a fire hazard.
Once the fuel is close to the bottom of the filler neck, stop pumping but DO NOT REMOVE THE NOZZLE YET. There is about two cups of 100LL still in the nozzle mechanism that will need to drain out before you can remove it, so retract the nozzle just far enough that you can watch the last drops of gas flow out yet not too far that it splashes all over the place.
Ask me how I figured that one out.
See that blue streak on the top of the wing? That’s from the last guy, who didn’t quite grasp the concept of keeping the nozzle in the tank until the last trickle had ended.
Once you’ve filled one side, replace the gas cap before you move to the other tank. This is extremely important, as you will (I personally guarantee) forget to go back and replace the other cap. Open gas caps can lead to contamination on the ground, and allow all your gas to be siphoned out while in flight. Another lesson learned through other people’s emergency landings.
The pump will shut off automatically, but it’s still up to you to put everything back. Wind the grounding wire back onto its spool, put the fuel line back where you found it (there’s usually a motorized device that will wind it back on the spool for you), and return any ladders to their proper position. In short, don’t be a dick — pit it back the way you found it.
REMEMBER: Sump you fuel tanks after you’ve added new gas to ensure that (A) there’s no contaminants and (B) its the right gas. Although you should be able to smell the difference between 100LL and Jet-A, a visual inspection never hurts too!